SEARCH
Mid-Century Malaise – "SHOW ME PICS" Version

Entries by celebutante (109)

Sunday
Nov032013

Sunday not-so-much-funday

Just when you thought I'd never post again... though I've been kind of slacking, I actually have done some stuff here and there, just not much "blogworthy". Anyway, I'm working on what I call "bedroom #2". This is the middle room which will be Kim's room for her stuff/general guest room. It'll house my extra full bed which is currently in various parts of the house.

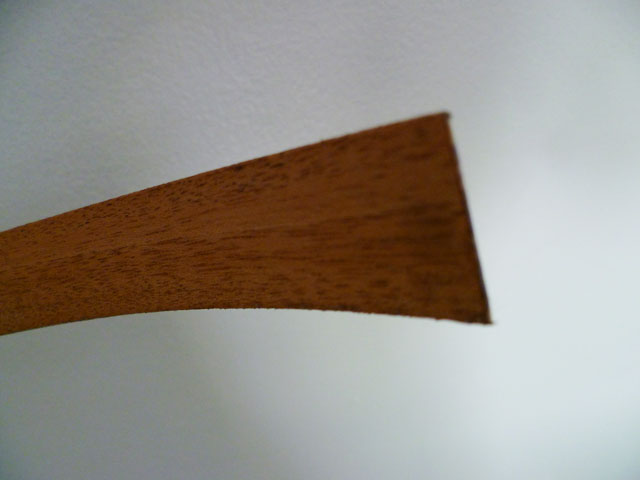
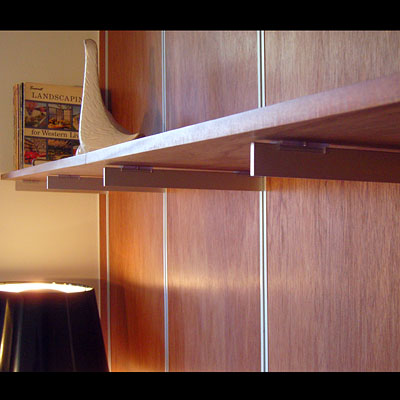
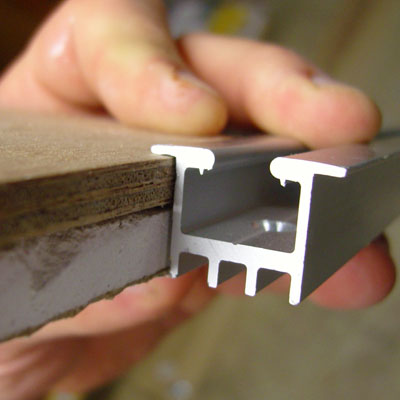
Because of its semi-central location, my cable modem and wireless router live in there. Until now it's been set up all ghetto-riffic. As an aside, we had to hardwire a CAT5 cable upstairs for the studio a couple months back (studio was too far for the wireless) so that's been hanging throught the ceiling, like this (sorry about my camera inappropriately doing its shallow-depth-of-field magic):

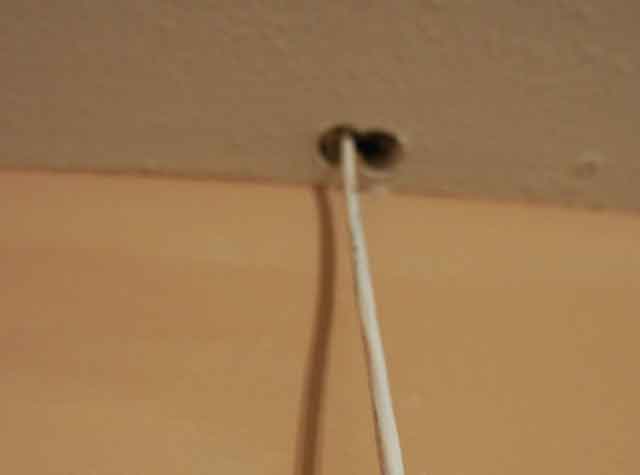
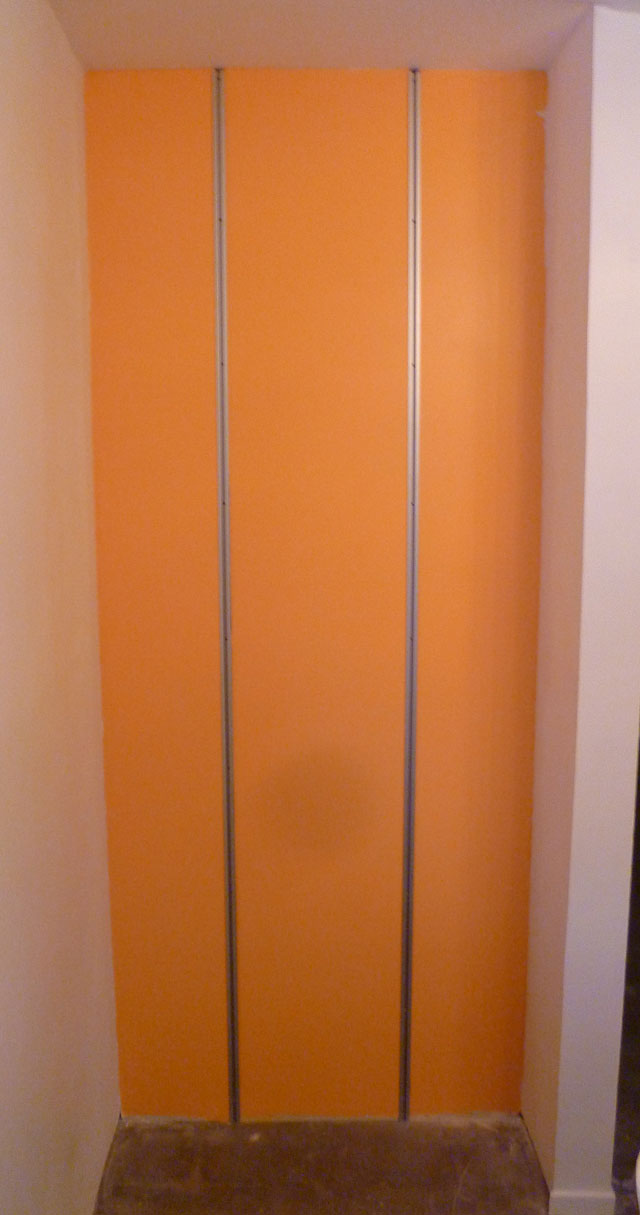
In addition to this I had a cable-TV coaxial cable jutting through the wall from outdoors. So... the idea was to hide both cables in the wall and have them both terminate at a wall plate. This being the Winchester mansion of electrical excess, there were two outlets next to each other...


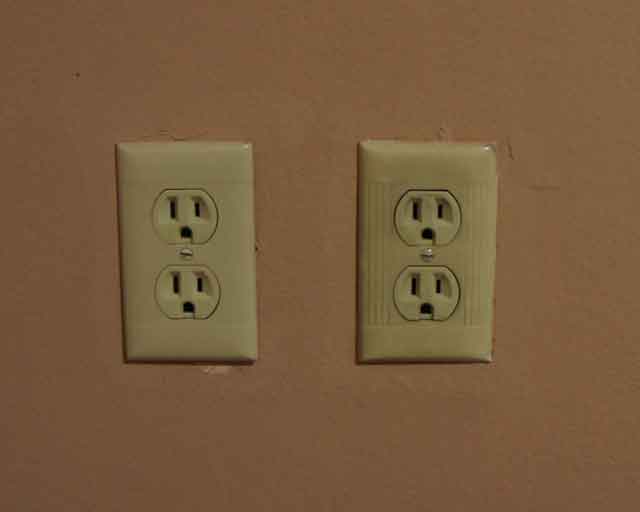
... so I removed one of them and used the location for a plate+keystone connector with a coax cable connector and a CAT5 for upstairs. As expected, giant-pain-in-butt part was feeding the CAT5 cable from the ceiling down through the wall to the plate (which is at standard near-floor outlet height on the wall). Let the wrist-scrapin' itchy insulation fun begin!

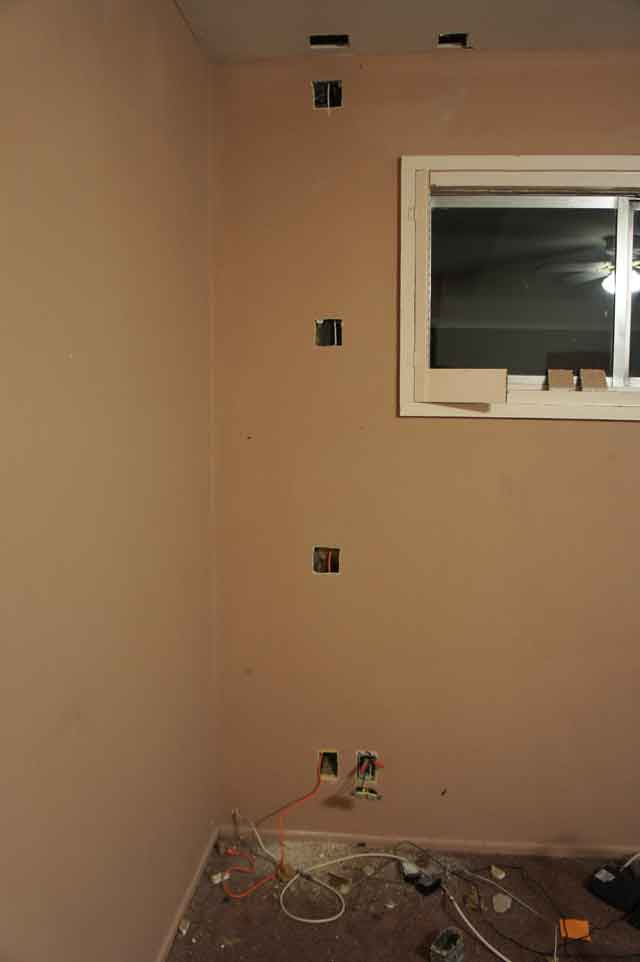
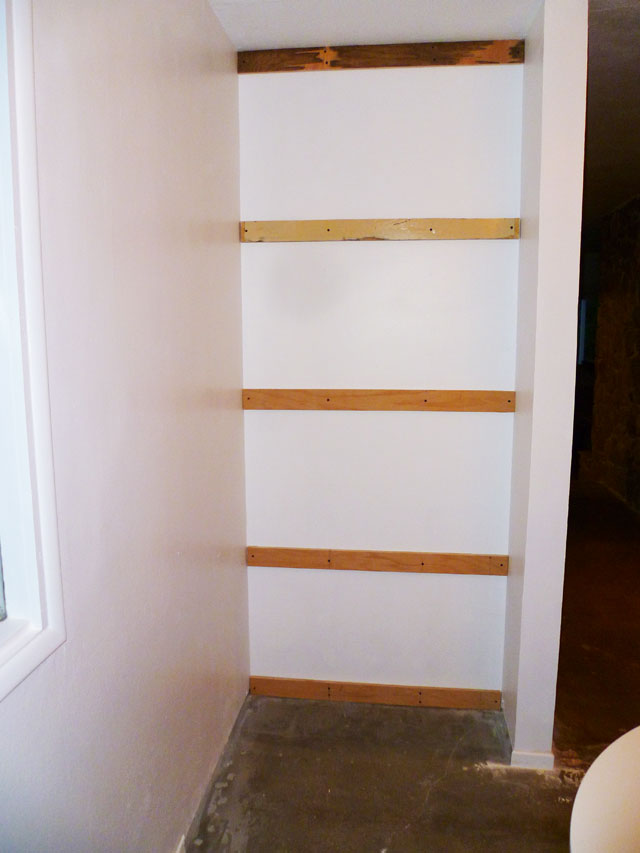
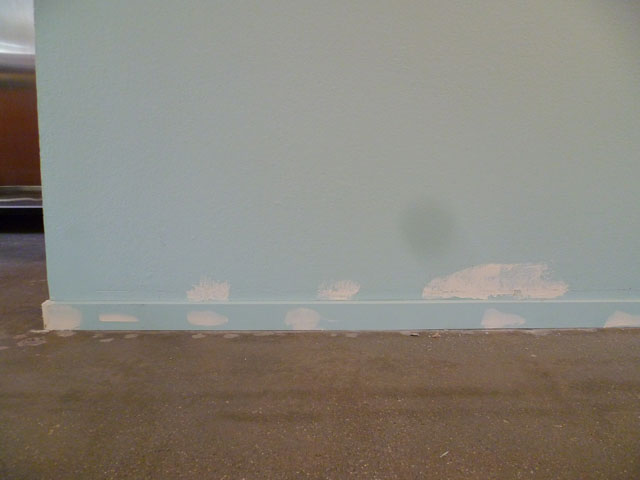
Nothing makes me happier than cutting five new holes that I'll have to drywall patch later on. The CAT5 started at the ceiling hole on the right, and of course there was a giant beam up there, so I had to drill a big hole in it to feed it through, then another to get it through the top of the wall (this was a double layer of 2x4 as well). Fortunately I have a new set of flat spade bits that worked just swell. Getting it the rest of the way down the wall would've been easy, but being an outside wall, there's a ton of insulation in there. This makes it tough to get the wire through and makes your hands itchy. Rad. Not owning any fancy wire-feeding apparatus, I ended up using a coat hanger to feed it through and with much swearing, I got it through. You can see in the bottom left corner where the coax cable comes in from outside. Since there was a stud in the wall between them (that would've required a lot of wall cutting to get to), I cheated and drilled a new hole outside that lined up with my outlets and fed the cable through there. Here you can see newly shorn Lester offering a helping paw:

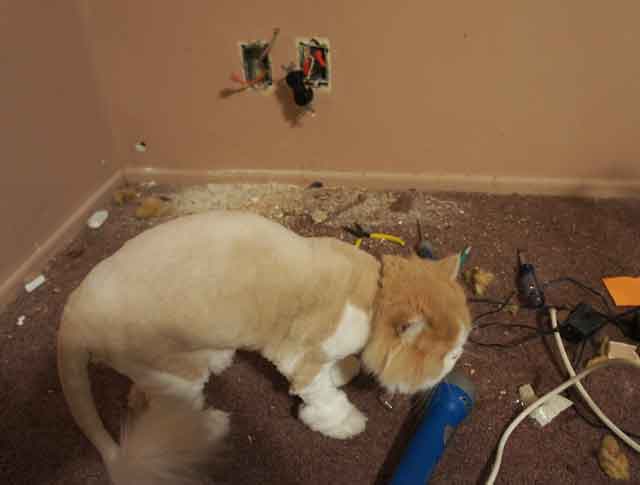
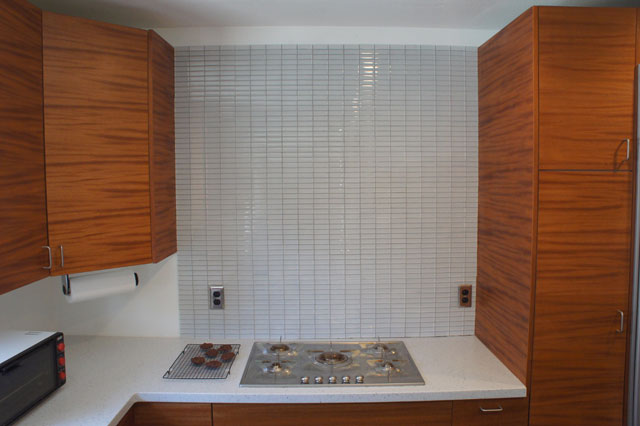
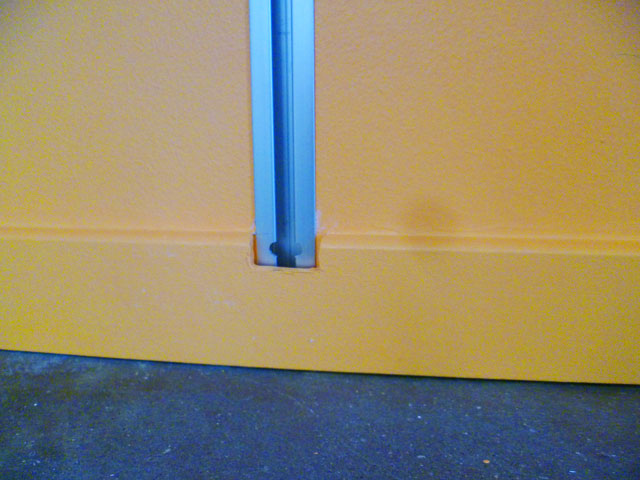
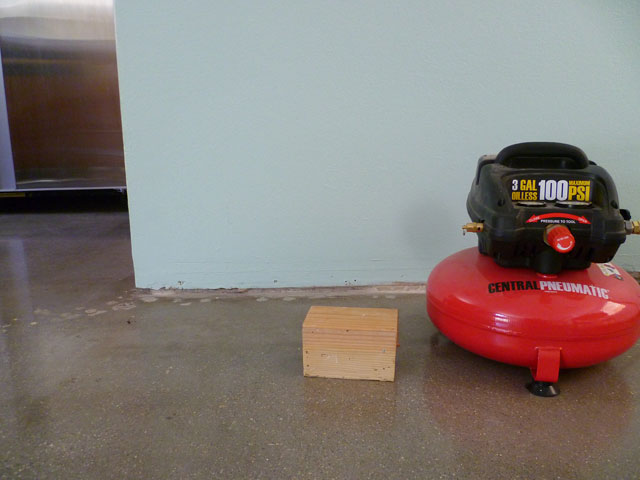
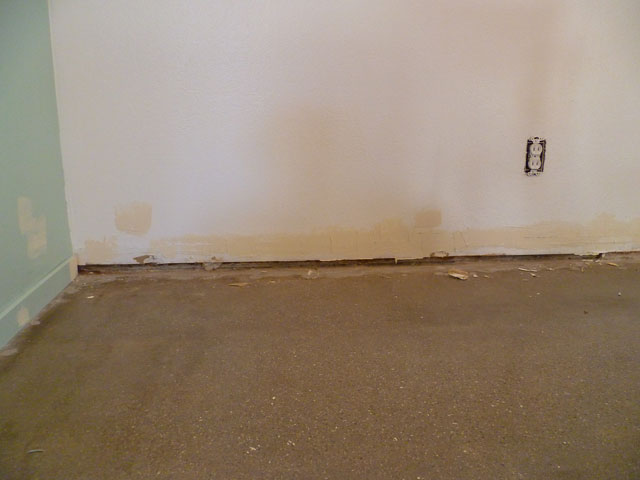
Below is with both cables fed through as well as a new black outlet in the remaining location:
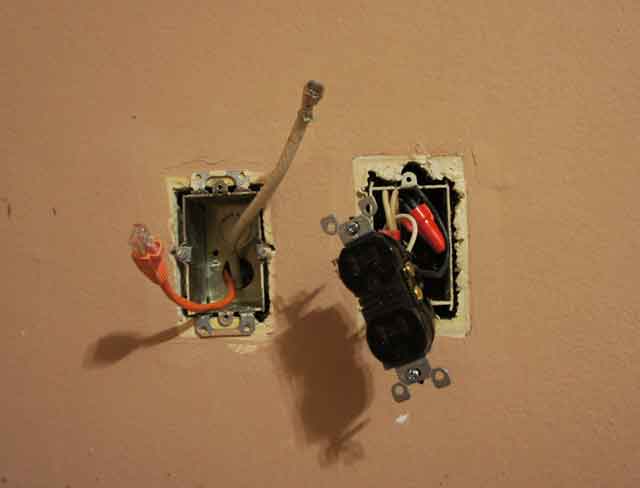
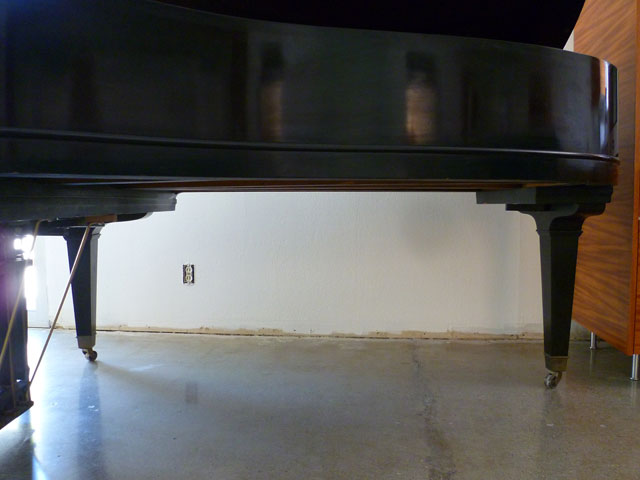
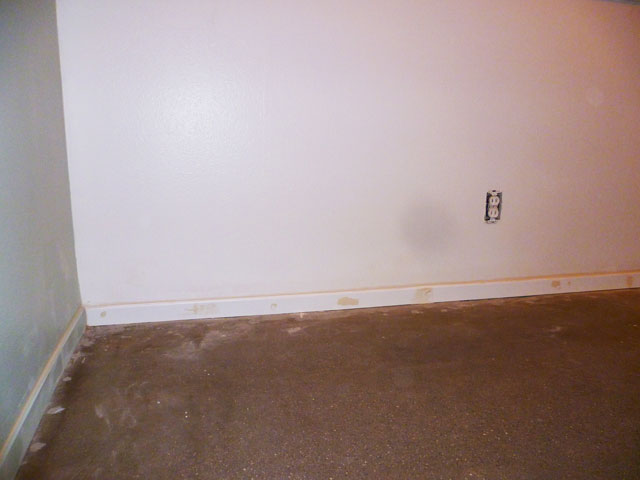
Completed:

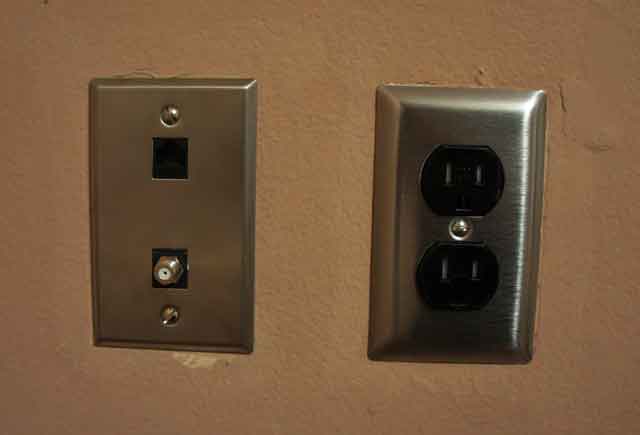
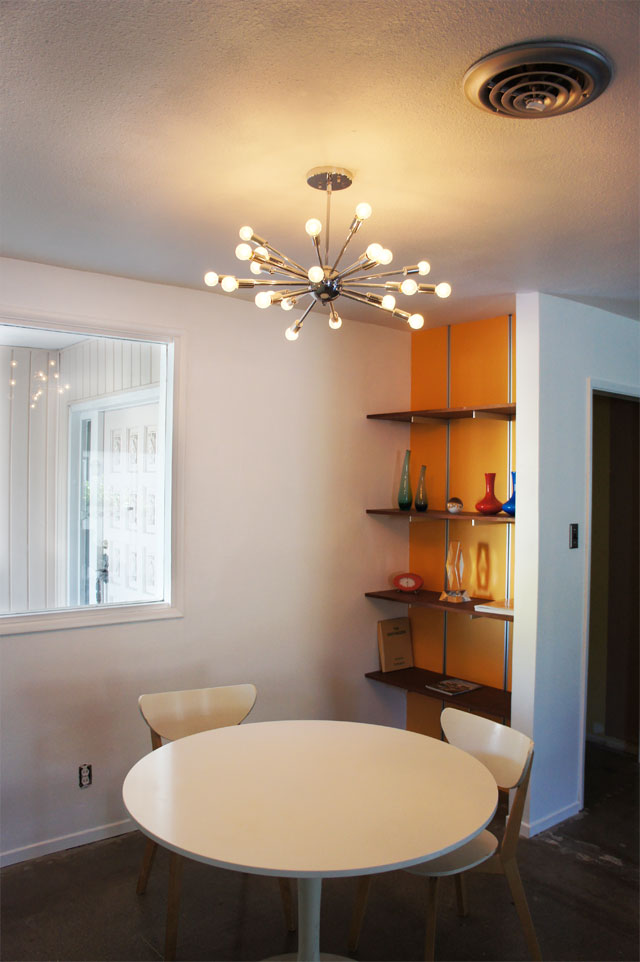
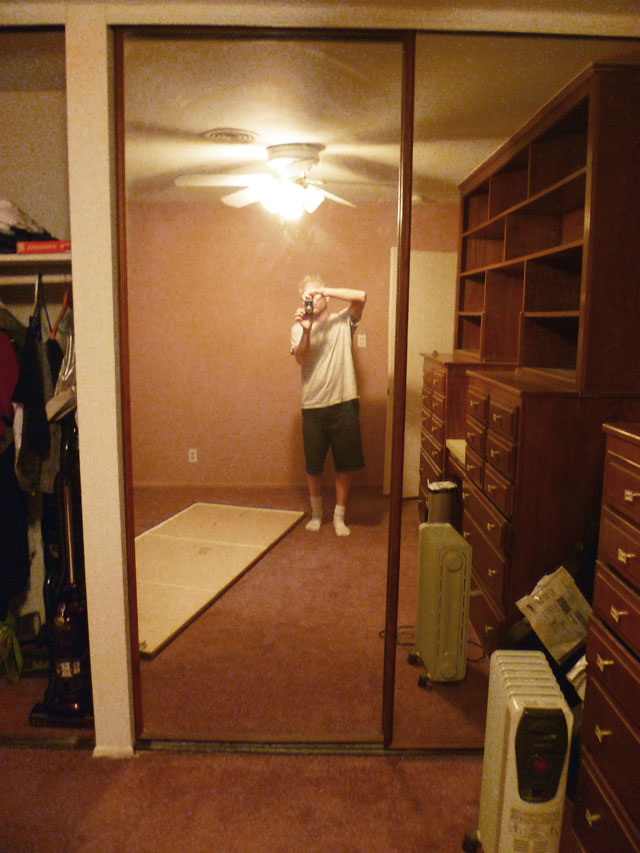
Soon I'll paint the walls gray and wallpaper one wall with fancy pants German vallpaper. I usually hate ceiling fans (there's a HIDEOUS one in there now), but since it's a Kim/guest room, I figured it wasn't fair to subject others to my ceiling fan problem... after much research, I finally settled on this rotating hotness, which arrives next week. Super duper minimal.
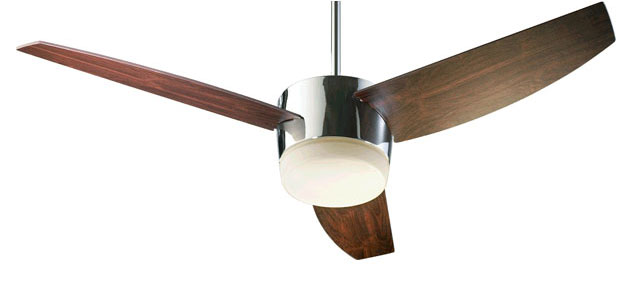
Friday
Aug092013

late vs. never

Been forever since I updated, so yeah, that. I've done a bunch of smallish stuff, most of which I'll cover and totally not in order. Today I did some work on the kitchen that should've been done, oh, a year ago-ish. I replaced the water spigot for my reverse osmosis dealie, which was this:

As you can see, this is a standard issue, el cheapo chrome special. I had planned to replace it all along as it didn't match all my other stainless/brushed nickel hardware, but never got around to it. Recently the metal tube broke and caused it to leak (see the water on the side?)... occasionally the whole piece would pop off and shoot water all over the place- you can imagine how fun that was. Thus I finally ordered this guy, which is one of the only slick and modern looking RO spigots available and miraculously it perfectly matches my Vigo faucet. Lucky me.

The only bummer was that replacing it was a pretty difficult affair because of the location of the sink. I had to slide my head way back (not easy with garbage disposal and large reverse osmosis reservoir tank+filters) and do some major stretching. But now it's done and clearly the sink looks far nicer (and doesn't leak).

I figured while I was futzing with the sink I should install the trim panel in front of the sink that I never got around to:


This too was a nightmare because there was even less room to screw things in between the panel and the front of the sink. Much swearing and screws falling on my face whilst upside down. Wee. Done now though, and it looks far nicer without a big dumb hole in front of the sink.


Was also gonna install the handles on the cabinet doors that I never got around to, but I actually used the ones I had for it in Kim's closet, so I need to pick up a couple at ye olde Lowe's. I didn't take photos, but I also removed a whole bunch of extra electrical I had in there. Originally I thought I was going to have a standard switch for the disposal, but I got the air switch (big silver button next to reverse osmosis spigot, read about it HERE) and it didn't get used, so there was a ton of unused live 120V romex (for the disposal) and even more for the switch (also live). Bunch of live 120V under a sink+reverse osmosis plumbing... what could go wrong? It's all removed now.

In completely unrelated news, Kim and I have been unraveling the mysteries of the built-in sprinklers here. Basically the entire front and back yards are set up with drip irrigation (good thing) but the bad news is that they were both non-functional due to broken PVC plastic pipes right at the valves. That's ok because I'd much rather fix plastic pipes in plain site than have to go nuts digging things up- burying things has a way of protecting them. Dogs, bones, etc.

Other than figure it all out, I haven't done much yet, but I fixed all the broken joints on the side of the house which now looks like this:

This stuff is as easy as plumbing gets- plastic pipes that are easy to cut and cement glue. I went fancy and got a quarter-turn hose valve which, as you might guess, only turns a quarter of a turn. And more importantly, is far less likely to leak than a standard valve. The pipe goes down and to the front of the house to a couple of electric sprinkler valves. Right now they're bypassed, but I'm gonna get a new timer and wire it up for automated front-of-house watering fun. Only hard part is the actual running of the wires.

In other news, the orange shelf project is done. It got majorly held up because I ran out of wood side edging stuff, then got new stuff which was a different shade, thus entailing a different shade of Danish Oil to make it match (which no one stocked, so I had to order it!). But it's done now and they all look uniform (note that there are four shelves here as opposed to my older pics where there were only three. Try not to note that my lens is making the whole mess look really spherical.)

This corner of the kitchen is shaping up to be the most authentically "mid-century" area of the house. Still gotta replace the outlets!

While I was at it, I painted the kitchen-to-laundry-room door orange and replaced the hardware with silver hinges and my fave Schlage "Orbit" knob. I screwed up a little redrilling the holes so it doesn't shut right, but I think it's pretty easy fix when I get to it.

Man am I behind... I haven't posted this yet either. Handyman Keith came over and (finally) did the glass tile backsplash about a month ago. It's essentially clear glass with a white backing, but the glass gives it a slightly silver-blue tint. We still need to install the overhead hood fan thing, which'll be a pretty major job.


In addition to all this, I started working on one of the bedrooms, but I'm not that far in yet. News on that forthcoming.

Finally, you may have noticed the quality of my pics has improved (note the arty blurred background in some of them). This is because I got me a new camera- my Panasonic Lumix point-and-shoot has been replaced with a Sony NEX-3. It's not the latest model, but I got a screaming deal on it used and it's a huge step up in quality and options. It's one of their wee-body-with- ridiculously-huge-removeable-lens models, and I'll soon be picking up a Sigma 19mm wide-angle prime lens. Not sure it'll improve the on the semi-fisheye effect that wide-angles tend to have, but it has better clarity and color, it's a great deal (about $130) and will be considerably less bulk on the front of the camera, which is good because I rarely use the zoom anyway (I just walk closer- I call that manual zoom!).

Wednesday
Jun262013

shelf, I need someone.

Still juggling three projects at once, but I'm pretty much done with next-to-kitchen table shelf project. If you're looking for a relatively complicated and expensive way to get some basic shelving, I highly recommend it!


You'll notice the top shelf is missing; I couldn't finish it because I ran out of edge binding (which should arrive in the next week)... this stuff:

(update... new roll of edge binding arrived today, and doesn't match the old. Now I have to experiment with stain colors... grrr!)

Here's how it works- I bought a 4x8 sheet of fancy pants mahogany-veneer plywood for the shelves. This is like normal plywood with whatever they use in the middle layers, but with a nice veneer of mahogany on the exposed top and bottom. To make the shelves appear to be a solid piece of wood, you apply this stuff to the edges. It's real mahogany, comes on a roll, and has an adhesive on the back which works relatively well (I say "relatively", because sometimes it doesn't work 100% and you have to glue and clamp it, but it's a pretty easy fix). Things I learned:

• already knew this, but a 3/4" sheet of plywood is really heavy. Have two strong people if you need to move it. Don't try and move it alone, that'll hurt.

• taking a big 'ol mean Skilsaw to a $63 piece of wood puts hair on your chest. Cut twice, measure once, or something like that. In other words, don't screw up.

• making raw, unfinished wood end up looking like this:


... is a time-consuming pain in the ass. I followed the advice of Hunter Wimmer/Redneck Modern blog guy: two coats of Watco Danish oil (golden oak), two coats Minwax Wipe-On Poly, and Black Bison Wax (which apparently has really high VOC content, is really expensive, but smells really good). As wood finishing goes, this is a pretty numskull easy approach for an amateur like myself. The Danish oil wipes on with a rag, but you have to let it soak in for a couple days, then it's the same kinda deal with the poly, so it takes almost a week to do the whole shebang.


Made from real Bisons, so you know it's good (not really).

As for the rest of it, I explained in a previous post... it used to be this:


I demo'd that over a year ago. I put up furring strips, so there'd be something to screw the "false wall" drywall and shelf standards to:

 You then VERY carefully measure the drywall pieces so as to leave slots for the countersunk standards to sit in, and end up with this:

I didn't take a pre-paint picture, but it's standard sheetrock fun and games- corner taping, patching holes where the drywall screws go in, etc. Only difference is that with the big furring strips, it's hard to screw up the drywall screw placement, and because this is 5/8" drywall (as opposed to standard 1/2"), it's a little trickier to cut, but the extra thickness makes it harder to accidentally pop drywall screws through if you overtighten. (5/8" sheetrock was used to match the depth of the shelving standard brackets so they'll countersink correctly)

Next challenge was the baseboards. Issue #1, the standards have tiny notches at the bottom to accommodate the horizontal locking pins in the brackets. At normal height the baseboard would cover these notches, and I'd have no way of sliding the brackets in (unless I put them in before installing the baseboards, but then I'd never be able to remove them, add more brackets, etc.). Other problem was that though the front "lip" of the standards is pretty flush, it still sticks out about 1/16th of an inch, making "speed bumps" for the baseboard- more than I could disguise with caulking. After debating a zillion solutions, I manned up and decided to cut notches in the top of the baseboard to accommodate the pins in the standard bracket, and routed out material from the back of the baseboards so the standards would clear the baseboard. Since I don't have a proper router, I used my Dremel rotary tool's little router base attachement. Unfortunately, my router bit is about the size of drill bit, so it's like using a squirt gun to put out a forest fire. And since the baseboard is cheapo MDF, I was concerned about breaking it altogether- if not while routing it, then while nailing it to the wall. But I managed to pull it off with no breakage or lost digits. Phew!


Only other mild PITA: though the lack of slots in the standards look slick, this means you can lock the brackets in position anywhere, so aligning the bracket pairs is a finicky trial-and-error affair. As mentioned, this is not a cheap way to go (about $130 in brackets/standards and almost $100 for wood and edge binding), but I love the look. In theory, you could get pretty close by doing the same countersinking tricks with normal slotted wall standards and cheaper shelves, but if you're gonna do it, go big right?

I'm going to repeat this whole mess in the "big nook" over by the fireplace, but the shelves will be considerably wider to accommodate my record collection, which has been languishing in boxes for almost two years now.

Friday
Jun072013

attention deficit dis... hey, what's that?!?

It looks like I'm out of my mind because I'm sort of doing three projects simultaneously, but there is some method to my madness. Yesterday I explained that I couldn't finish off the kitchen/living room baseboards because of shelving that needed to get done... but the shelving project requires 5/8" drywall that I don't have and can't carry myself (it's heavy and awkward). Tomorrow John's gonna go to Lowe's with me and help me get it.

In the meantime, I got to work on a project I've been contemplating for a long time (and bought most of the materials for last week)... DIY closet doors for the middle/guest/Kim bedroom. There are two closets side-by-each in there. Each has an opening 72" wide with two doors and goes from floor to ceiling. Here are the current mirrored monstrosity doors:

I dislike the mirrors, and more importantly I hate the brown picture-frame-special frame. I contemplated long and hard... one idea was to get Ikea Pax wardrobe doors, but the slick silver and opaque glass ones were about $250 a pair, and I'd need two pairs (actually, I'd need four pairs, because the room next to this one has identical closets and doors). This doesn't even take into account shipping, which would likely be around $300, so that wasn't gonna fly.

I did a lot of googling DIY closet doors, and people were commonly making 1x4 frames, then using a variety of backing materials for the popular "panel" effect... like this:

This one doesn't look too bad, but in general I'm not a fan of the sunken panel effect (don't get me going about beige six-panel doors), so it occurred to me that I could make something like this, nail a flat piece of 1/4" luan wood to it, and essentially hang it backwards. This way you'd have the structural stability of the frame, but the front would look like a flat slab of wood, and I'm all about a flat unadorned slab (because I've seen 2001 too many times- like this). I got the luan panels from Peterman's Lumber here (fancy wood place), because the Lowe's Depot doesn't carry 1/4" luan, and accidentally bought the wrong thing. Luan is sort of a cheapo medium-brown mahogany, and was frequently used for wood wall cladding in sixties houses, so that was the plan, but the "good" side of the stuff I bought is actually birch, which is considerably lighter (think of the light wood  on every piece of Ikea furniture you've ever seen, but not fake). I was gonna return it, but since I thought I'd hit with some of my swell new Watco Danish Oil Golden Oak rub-on stain on one corner and see how it turned out, which is this:

The picture doesn't really do it justice- it's WAY nicer in person...  almost zebrawood-ish, super smooth, pretty shiny and I haven't applied polyurethane yet. So I'm keeping this stuff for the doors. In ze meantime, I already picked up a bunch of 1x4 for the frames so I went to work on that today... a little detour here... if you ponder the idea of attaching 1x4's end to end (which in reality are 3/4" thick, 3 1/2" wide and however long you cut them), there aren't many good ways to do so. You can't really screw them together, because you'd need to use really long screws. You could use L-brackets, but that would be kind of ghetto and probably not very strong. There's lots of glue options if you're a pro woodworker- biscuit joints, finger tenon thingees, blah blah. Enter the Kreg Pocket Hole Jig:


You clamp this awesome piece of awesomeness to the end of one of your 1x4's, and it lets you drill a perfectly angled hole in exactly the correct spot. They've pretty much thought of everything- they include a bit with a collar so the depth is exact, and the box it comes in has a guide for where to tighten the collar on the bit for different material widths. They have you use special square-head screws that won't strip, and they include a driver bit too. It's next to impossible to screw up. The kit is around $40, which is a little steep, but it's worth every penny. Here's what it looks like clamped in place with a standard wood clamp:


And what you end up with:

Just for fun, I wood glued the whole mess too. Since switching bits every time is no fun, it become rapidly apparent that "production lining" all my holes was the way to go. I wasn't thinking too hard about how the things were gonna be built, so I drilled way more holes than necessary, but it didn't really hurt anything. Duh.

Here's a completed frame:

I built three-and-a-half of them today. Would've been four, but as usual, I underestimated how much lumber I'd need, so while I'm getting that drywall tomorrow for the shelves, I'm gonna get another eight-foot 1x4 to cut the remaining pieces. Anyway, between the perfectly centered pairs of pocket holes and the wood glue, they're pretty darn strong. Tomorrow I'll cut the 1/4" luan panels for the faces and nail those on- had to buy a new 18 gauge brad nailer from Harbor Freight for that (the 16 gauge one I've been borrowing from John can't use short enough nails). Lucky for me, it was only $20... yay cheapo Harbor Freight.

I'm also gonna need to get new hardware for the doors to slide- the current hardware has the doors rolling on the floor, whereas I want them to hang (not only is the floor track ugly dark brown, but it'll complicate my future laminate wood floor install). Finally, I'll need to make new wood valance pieces to hide hardware up top. There are pieces there now, but like everything else in this damn place, they've been slathered in gross brown paint.

Thursday
Jun062013

hey, some new crap! 

I'm ashamed to admit that I've had the kitchen mostly done since the end of last year, but there are details  I've totally put off that I'm finally getting around to. One big thing is baseboards in the entire kitchen and big room... I finally purchased, painted and installed them this week. Here's the "before" with a cameo from my Harbor Freight cheapo air compressor (for Mr. Nailgun):


and after-ish. I say "-ish" because they still need various sanding and paint touch-up of the patches that conceal the nails. I already caulked all the corners, but need to paint that too (at least on the blue wall, not so much on the white walls), There isn't really a big stain on the wall, that's some sort of photo artifact.


While I was at it I decided to fix some wallpaper mess that I must've been too lazy to fix when I originally painted. I attacked it with a putty knife, so that's why there's patches above the baseboard...


After sanding, painting. The photo is making the caulk look really yellowy for some reason. It's not. Baseboard still needs work:


Then I ran into a little problem. Remember this hot mess o' hotness?


I demo'd that guy way back in Novemeber of 2011, and ever since there's been an empty space wherein I planned to add shelving. Me being me, cheap and simple wasn't gonna do; I had to have something expensive and complicated, and I found it in Hunter Wimmer's Redneck Modern blog- basically this (hopefully he doesn't mind that I'm stealing his pics):

What's goind on there is he's essentially built a false wall- the brackets (from Rakks) are pretty much like any run-of-the-mill slotted brackets you get at Home Depot, but they're designed to countersink. And they don't actually have visible slots, because they use a fancy pin system with the hangers. The pic will explain the countersink much better (also stolen from Redneck Modern). You can read all about his installation here, here, and here if you're interested in how someone who knows what they're doing does things.

I'm basically gonna do the same thing, but instead of fancy veneered plywood, I'm gonna use 5/8" drywall, painted a festive orange. Instead of attempting to line up the screws holding the "in-between" drywall pieces and the brackets to the studs, I realized it would be far easier to install horizontal strips of 3/4" plywood and attach everything to those. I ripped these down to 3" wide with my table saw... they're leftover plywood from when we demo'd the bay window in my family room:

Since the distance from the lip to the back of the bracket is 5/8", I just need to get some 5/8" drywall, figure out the width of the drywall pieces, carefully cut it to the exact width, then screw the whole mess to the horizontal pieces (aka furring strips).

As you can see, the front lip on the bracket gives a little fudge room if the drywall width isn't perfect, but not much. The good news is that this whole mess is 39" wide, and not only is drywall 48" wide, but you have to buy two pieces at a time, so I should have a couple extra chances if I screw up. Once that's all done, I'm gonna get a pricey and pretty 4x8' piece of mahogany-veneer 3/4" plywood, cut out a bunch of shelves and stain and poly them up all nice-like. I'm even considering sawing some slots in the top and bottom ones so I can do little sliding doors, but we'll see how that works out.

"How does this relate to the stupid baseboards", you ask? Well, since I'm doing a false wall that will stick out 1 3/8", I need to wait until it's installed before I can finish the baseboards on the back and sides... which is what motivated me to finally get cracking on the stupid shelf project!

Finally, if the shelf thing works out swell and I don't permanently attach my finger to a shelf with construction adhesive, the Big Plan is that I'm gonna do the exact same kind of thing here, which looked like this when I moved in:

It actually looked pretty nice (besides the gold hardware), but the cabs were so shallow that they were useless for anything other than maybe wine bottles. Currently there's nothing there- floor is polished concrete and walls are painteed white- guess that was wasted time. My plan is to do shelving on all three walls as detailed above. This'll be nice because I still have boxes of books and LP's (remember those?). Wait 'til to see what I have up my sleeve to play those on...

UPDATE: Kim and I figured that the mysterious spot in the pics I took today is probably a splotch on the lens of camera. I am the Barney Rubble of photography.