Back in blog
1/28/2012

Looks ugly, but it's actually pretty smooth, and I believe it's ready for primer. As explained in an earlier post, you just take a very soapy sponge and saturate the wall; this loosens the glue. If you're lucky, it just peels right off, otherwise I scraped with a plastic paint scraper. It's not too terrible, but the wall's kinda big, so it takes a while. I also duct taped the power outlet and light switch and turned off the power to prevent water-related electrical shenanigans. The duct tape did a great job of keeping water out. After that, there were a lot of little holes and various areas that needed patching, but after all my drywall adventures, this was light work. That said, I started moving into the adjacent family room for more wallpaper removal, but it's a different kind of wallpaper and the glue isn't nearly as easy to remove, so I'm gonna have to resort to some kind of plan B. Steamer? Day-laborer? Powerful solvent? Probably the latter.
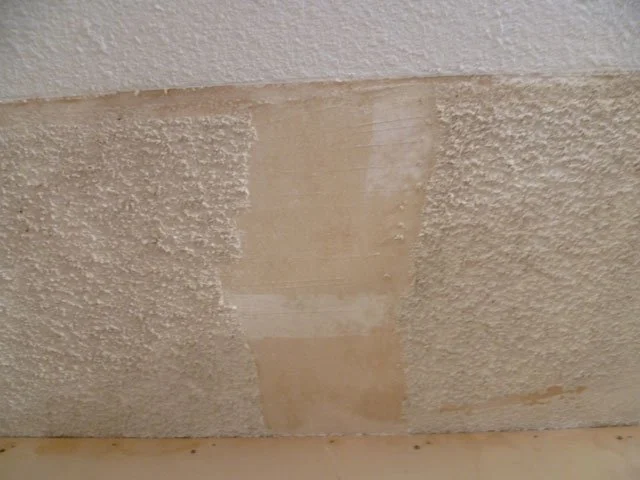
Moving right along, I also removed some popcorn ceiling. The vast majority of the ceilings are "knockdown" texture (more on this later), but apparently this was a later addition; there's still popcorn in various closets, etc. Remember the "granny cabinet"? When it was in place, it covered the ceiling, but once it was out there was popcorn ceiling above it, so I removed it. (BTW, you can see the difference; the top of the pic is the knockdown, the partially removed part is popcorn).
Removing the popcorn ceiling was ridiculously easy. I just got it very wet and soapy with a sponge (a spray bottle would've saved me from the water running down my arm, but I didn't have one), then took the metal drywall joint knife (the thing you actually apply mud with) and it easily scrapes off. Drop-plastic beneath simplifies cleanup.
Finally, I've done a lot of work on the walls and ceiling. I suspect you're as tired of reading about it as I am of doing it (and typing about it), so sorry about that. Suffice to say, making a hodge-podged, swiss-cheesey drywall job look nice is a lot more difficult and time consuming than I expected. I haven't taken pics of all of it, but there are a lot of areas that needed love. Wall edges, giant pieces of wall that were removed to install gas lines, numerous previous light locations, etc., ad infinitum. The good news is I'm very close to the finish line. The other good news is that I'll be attempting to match the ceiling texture in the rest of the room, so the kitchen ceiling doesn't really have to be perfect, because the texture will disguise blemishes. One thing I've learned about a drywall/ceiling job like this is that you could do it forever and ever- carefully trowel mud, let it dry, sand, create Mt. St. Helensesque dust cloud fallout, repeat x infinity. It's really a question of how much of a perfectionist lunatic you want to be about it. It'd be different in a new house, because there aren't a zillion holes, and everything lines up more or less correctly, but in a 49-year-old place, you have to make allowances.
As for the knockdown celing, for those of you not famililar, it's similar to a popcorn ceiling, but while the compound is still wet, they drag a wide taping knife across it, thus "knocking down" the stalagtite-ish edges. It's a bit more subtle. Fortunately I like how it looks, otherwise I'd be in a world of hell removing it throughout the entire house (unlike the above-mentioned popcorn ceiling, it's painted, so the soapy water removal trick wouldn't work). After a fair amount of research, I found the best way to do the texture is to just rent an air compressor/hopper (thing that holds the actual compound)/spray gun combo from Home Depot, so I'll be doing that magic pretty soon here. Just to be safe, I'm gonna primer the ceiling first. It may or may not be necessary- some of the how-to vids I watched said to do it. Here's some before and after fun:
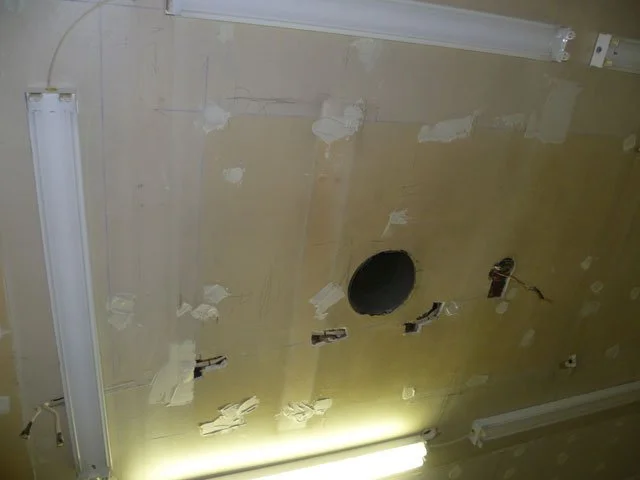
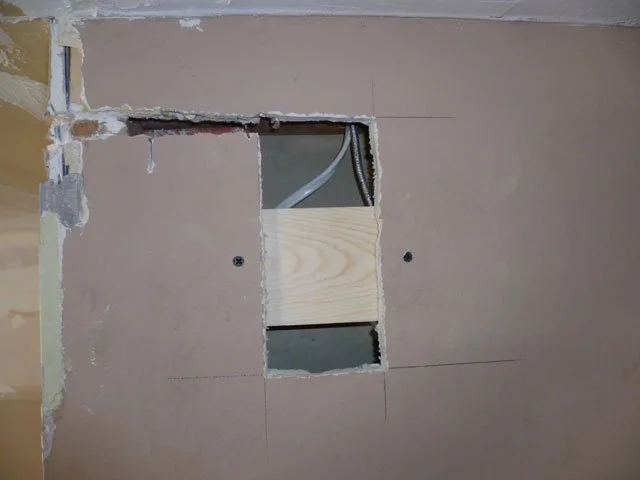
This is about a month ago. Fluorescent lights still in, recessed lights not yet installed. I had already done some sloppy patching (before I embraced the miracle that is mesh tape), but there were still a bunch of irregularly shaped holes from previous electrical- they didn't care about cutting tons of holes because it was all covered up before. These holes were all a total pain in the ass because fixing them entails enlarging the holes with a drywall saw so they'll be rectangular, then you stick a piece of 1x2 or 1x4 across the hole and screw it in. This gives you something to screw the new piece of drywall to (look at below pic and it will make sense). I had to do at least a dozen of these patches (!).
By the way, the one below was particularly super fun because the previous owner had wedged an electrical wire IN the drywall (apparently behind the drywall wasn't good enough), so I had to cut that slot out, and get real creative cutting a narrow slice of drywall to fill it. The wire ran out the through the corner reinforcement (it was previously hidden by the soffit I removed) which was a mess, so I had to hacksaw the whole piece out, replace it, and make the whole mess look like a wall/corner again. Perhaps you're getting an idea of why all this is taking so long: forty-nine years of accumulated stupidity in this joint.
Anyway, below is what the kitchen looks like as of an hour ago:
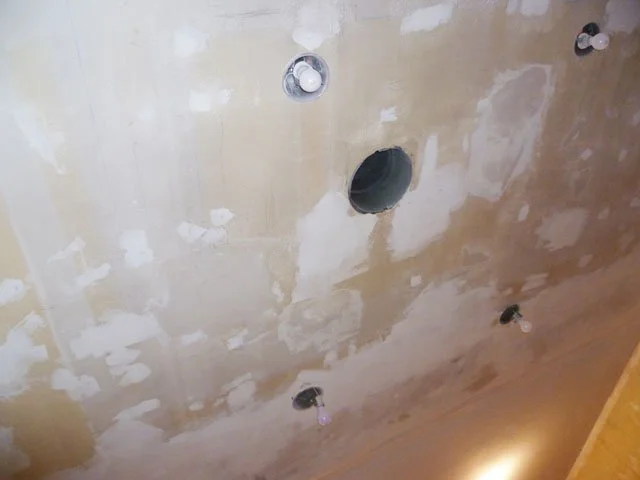
It doesn't look beautiful, but it's pretty flat and as mentioned, took a TON of work to get to that point. You can't really see it in this shot, but the hardest thing was that we replaced almost the entire perimeter of the ceiling drywall because of the previously-there soffits. The pieces were on either side are about 10x3, so that's a LOT of taping and joining over your head. On a ceiling that's a half-century of not-all-that-level. You get the picture. Tomorrow I sand it for the last time and will probably roller on the Kilz (the primer, not the band).
One more thing... the Semi Handmade guys called this week (the company making all my cabinet doors, drawer fronts and side panels) and they're basically done and shipping in the next week or so. I went with mahogany, so they'll more or less look like the lovliness below, minus the silver glass doors that I'm not nuts about anyway. Once I get the ceiling textured and the walls painted, it's time to build all the cabinets (the Ikea frames are currently in a zillion boxes and bags in my garage), and I'm well on my way to a bitchin' kitchen.
