SEARCH
Mid-Century Malaise – "SHOW ME PICS" Version

Sunday
May262013

allow me to vent...

I haven't exactly been on top of house reno fun lately, but circumstance forced this one. You may have noticed the raunchy brown HVAC intake vent behind my futon in the last entry. Not only did they slather on the same ugly brown paint they used on the walls (because any-job-worth-doing-is-worth-doing-wrong™), but the whole thing is bent and screwed up, so there was no salvaging it. Months ago, I searched for online for a replacement, but it's really hard to find super big ones like this, and I turned up nothing. Fortunately, the guy who did my upstairs A/C install had secret underworld HVAC vent connections, and not only did he source the correct-sized replacement, he gave it to me fo' free. (because he felt bad about the lousy job his subcontractor did. He's a cool guy.) I put off installing it forever because I had grandiose plans of spray painting or powder-coating it silver. But...


If you look at the photo you might notice the piece of duct tape holding it shut (it's hinged at the bottom and swings down for filter replacement). It sort of wedges shut, but because it's bent, it likes to fall down and open. This all could've been circumvented (get it?) had they not installed it upside down, thus allowing our pal gravity to hold it shut... but I refer you back to that "any-job-worth-doing..." axiom. Anyway, after it falling open for the zillionth time (not to mention what a @&*%ing eyesore it was), I finally decided to swap it out for the new one. My swanky house will have to get by with a white vent on a white wall. And BTW, the new one has little half-twist screws at the bottom to hold it shut (relatively unnecessary, because captain genius here installed it right-side up- it's now hinged at the top).

To remove the old one, I carefully sliced around the perimeter with a utility knife to make sure I didn't mess up the paint, then unscrewed four hex-head sheet metal screws inside. Fortunately the new one was exactly the same dimensions. After I screwed it in, I caulked the perimeter to make it look nice.

My next project should be getting underway real soon and it's gonna be a doozy- I'm going to attempt to make my own closet doors for one of the bedrooms to replace the mirror 'n' fake wood monstrosities that currently live there. Just ordered this nifty pocket-hole jig hotness this morning to assist in making the 1x3 frames... stay tuned.

Sunday
Mar102013

futon rouge

Rememer the futon I was blabbing about a couple weeks back? Urban Outfitters took their damn sweet time, but six weeks later, it has landed. Meanwhile, the "old" futon has now made its way up to the studio where I had originally intended it to be:

Like the purpley-gray one, no one's gonna mistake the new one for a fine multi-thousand dollar settee, but the wood is surprisingly nice considering the price (regularly $599, insane closeout price $249). This is it in brown/gray- for some happy reason, they stopped selling the black/white one, hence the crazy discount.

It's barely even a futon; the back cushions have flat bottoms and sit on top of the one-piece bottom cushion. When it's sleepy time, you simply remove the back cushions and lift out the metal support behind them and sleep atop what's left.

Thursday
Jan312013

blinded by the blinds

Two weeks ago, I moved all my studio gear upstairs and set everything up. A large undertaking it was, especially since I rewired and cleaned everything- most of my studio gear (and cables) was still covered with silt from way back when I did all the drywall madness in the kitchen. With everything upstairs and set up, I discovered two things... 1) even with the tinted side windows, the daytime sunlight is brutal. Fine when you're painting and sawing things, but blinding when you're trying to use a computer, and 2), my wireless internet connection worked like crap (the router is really far away).

After a LOT of debate and Home Depot/Lowe's head scratching, I finally decided that to bite the bullet and have custom vertical blinds made (and by "bite the bullet", I mean spend over $300). I had them done by blindster.com, mainly because they were the most affordable, and they happened to have a blue that matched my wall and doors almost perfectly. It took a couple a weeks, but they arrived today in the really long box shown above. Installation was relatively easy (you screw in four brackets for each window and pop the top bar in). I hadn't thought about it when I ordered, but the top bar happens to be silver aluminum, so bonus for my silver-lovin' self. Truthfully, I've been avoiding posting pics of the studio because I had temporarily cured the sunlight problem by hanging a sheet in the brightest window... trailer-trash-eriffic:


Here's what things look like now:


As you can see, I've put up some acoustic foam, but it's just stuff I had laying around. Gonna order some nicer, newer stuff later. (it's just to deaden the room a bit) A far cry from the shot below, taken almost exactly one year ago:


Which is pretty much the shot below (above is before the new wall+door was built):

Moving onto problem#2, crappy internet, the irony is that my laptop works fine up here, but my desktop internet barely worked at all (it speedtested at around 1 mbps and sometimes didn't work at all). There are numerous wirelss amplifier/extender devices one can get, but for not too much more dough, I figured the smart move would be to have my handyman (and John) help me run a hard-wired CAT5 cable to the studio from the back bedroom downstairs. This was a day-long project resulting in new holes to drywall patch (story of my life), but we did it, and it works. At the same time I upgraded my connection, so now my internet blazes at around 20 mbps for downloads. I ordered a brushed stainless plate and black guts for the plate (actually I had to spray-paint part of it black), but you can't see the black that well because of the flash. Trust me.


Oh yeah... the week before the blinds adventure, I officially installed the oven.

This was another can of worms, because the mahogany trim piece made it too narrow for the lip of the oven to fit (Ikea doesn't think you're gonna have big third-party trim pieces hanging on the side). You can't see it in the pic, but I ended up shimming it with pieces of 1/16" masonite (in order to move the big wood trim piece outward). That's better.


Though it looks pretty in the pics, I still needed to have a gas line run so it would actually like, work, so I called my buddies at Now! Plumbing, and they crawled around the rafters and made that happen. And made more holes in my wall. More drywall patching (see a pattern here?)... the yellow thing is the actual flexible gas line, and the the blocks of wood in the corners are 1x3 scraps I put in as a backing for the drywall patches to screw into. This one was kind of a bear because that whole jagged section at the bottom broke partway through, entailing even more patching, and a lot more swearing.

Here with the drywall pieces screwed in place. I've since mudded and sanded the whole mess. Still have to paint it, but I'm not going too nuts making it look perfect as it will be concealed by cabinet doors and trim pieces. Now I have to decide which microwave I'm gonna get then reinstall doors and make some trim pieces from the remaining mahogany pieces.

Finally, I ordered the futon below, this time spotted by Kim on Urban Outfitters (crazy cheap closeout at $249, regular $599). It's their "mid-century sofa", and I dig the minimal design and twill fabric. This will go downstairs by the piano, while the grayish-purple one that currently lives there will go up in the studio where it was initially intended to be. I didn't specifically need a futon for downstairs; a conventional loveseat would've been fine, but this was pretty neat and a great deal (I still have an entire couch in the garage for the "family room" when I get around to fixing that up). I guess the good part is that once we have the guest room going, my house will sleep around eight :P

Monday
Jan072013

smash a bottle over the hull.

Holy crapballs, I thought I'd never get there, but Upper Decker Studios is pretty much done. I still have some minor paint touch-up on the baseboards (as in, most sane people wouldn't notice), but as you can see, I brought up my big Ikea Broder shelf thingee and built up "keyboard rig #2" (that being a Prophet-5, Jupiter-4 and Korg Delta, for trainspotters. And Kim pulling a Dian Parkinson.), which is the ill-tempered, wonky old synths. The setup that I use all the time is this, minus the Alesis Ion, which just kinda happens to be sitting there:
... which currently lives in the seemingly endless sea of brown of one my bedrooms. This will all travel upstairs imminently. I'm not looking forward to getting that big studio rack on the right upstairs!

Here's what I've been up to in the home stretch:

A whole lot of drywall compound, sanding, caulking and painting to cover up nail holes and seams in the baseboards and quarter-rounds. This is really tedious, and crawling around on the nice hard new floor doesn't add to the joy. Makes a big mess too.

Same deal on the blue wall. My original plan was to use clear caulk so I wouldn't have to do as much touch-up painting, but I learned that paintable clear caulk does not exist (at least according to Handyman Keith). On a positive, this saved me a trip to Lowe's.

Next big job was door install. This was a big pain mainly because it's solid core and weighs a LOT. The threshold has a rubber seal strip at the bottom that wedges against the door bottom, but it requires you to cut the bottom of the door at a mild angle, so I had to wrestle it up (using shims to elevate it to the right height to install the hinge pins), figure out how much I needed to cut off the bottom, then take it down again and cut it with a Skilsaw. Then I had to put it up all over again. The bad part is it doesn't close 100% because I probably screwed up aligning the door jam when I installed it, but it's probably fixable (it's not that far off). I'll have handyman Keith work his magic; this is what he's good at. As you can see, I brought up my guitar rack.

After much debate, I wisely bit the bullet and decided to do recessed lighting... I still had eight of them left from the ones I installed downstairs- they were originally intended for the family room, so I'll get more when the time comes. As with the ones downstairs I had Keith do the bulk of the install. The tricky part this time was that there's no attic access upstairs, so we had to run the wires from below, and adding to the fun, the ceiling is drywall with one-inch thick 12"x12" acoustic tiles glued to it. These have likely been there since '76 when the addition was originally built, so you probably can't get them... meaning we had to be really careful cutting the holes (should be clear now why I had Keith do the install). Running the wires was also complicated by the large amount of blown in and batt-type insulation (which delightfully rains down upon you with every hole cut. Yum.) We used a wire snake (basically a big roll of rigid flat steel with a hook on the end) to run the romex cable. This is relatively easy when you're going the same direction as the roof joists (no obstacles) and a real bitch when you're not (it's like jumping hurdles you can't see, with lots of insulation to further screw you up). Patience is your friend here, and eventually we got all the wiring where it needed to be. Adding to this, the clips that hold Home Depot's Halo brand recessed lights in the ceiling are a nightmare to work with. Thanks again Keith, who has a higher frustration threshold than I.

There was a big hole in the middle of the room where the ceiling fan/light used to hang that needed patching. I used one of the round ceiling tile/drywall pieces Keith cut for the new lights. Since there were big gaps, Keith had the excellent idea to chop up some of the ceiling tile scrap and mix it with white latex caulk into a paste then use that as filler. This hides the patched area pretty well (sorry, I forgot to take a picture, but if you look really close, you can see between the two middle lights in the pic below).

Finished result:

Here's my handsome self prior to bringing up the keyboards today. Please note that I'm not actually obsessed with slate blue/gray. Just a coincidence (I really like orange- ask anyone).

Now I mainly just need to move everything up and wire it, and put some acoustic foam on the walls to damp down reflections. The main room isn't too bad, but as I expected, the vocal booth sounds like a tiny racquetball court with the door closed. Fortunately I have a lot of acoustic foam that I need to somehow stick on the walls; you don't really need a ton, just enough to tame it down. More on this later...

Wednesday
Dec262012

plugging away.

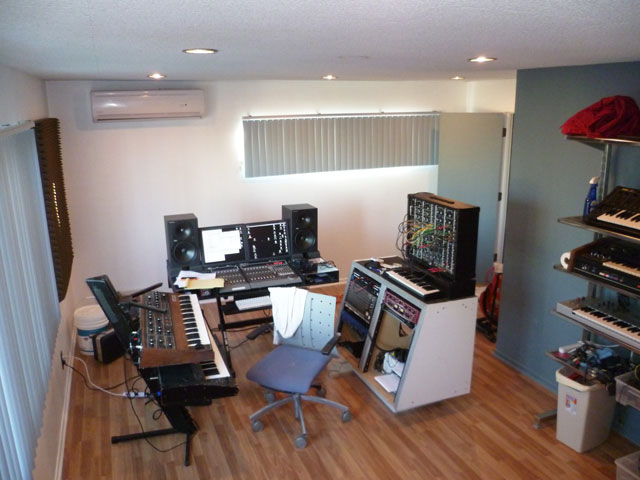
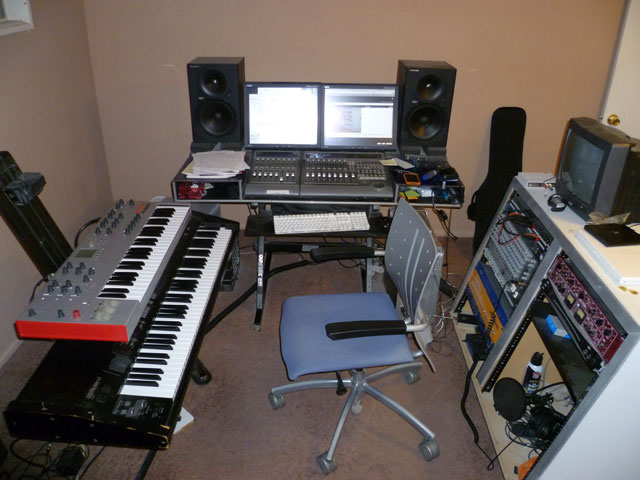
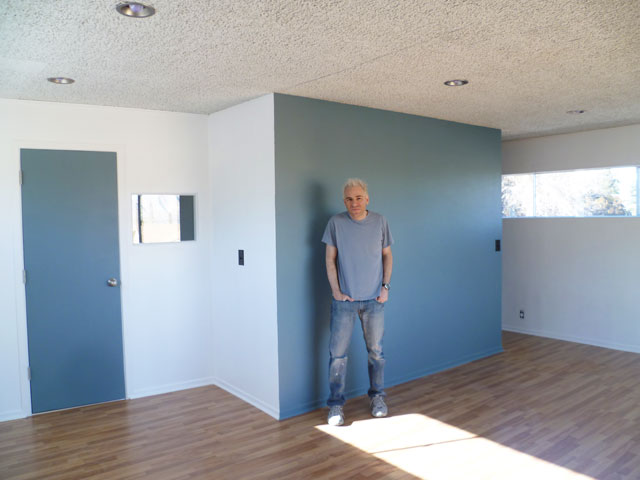
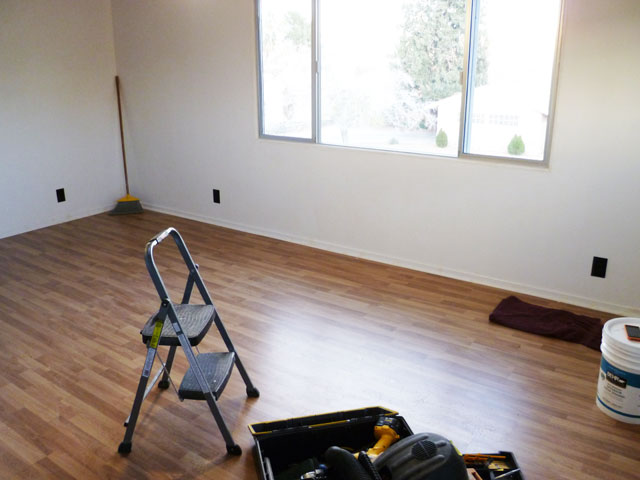
Today I did lots of covering nail holes with drywall mud. Since that only took about a half hour, I decided to work on electrical. Not sure if anyone noticed this in yesterday's big pic, but there were two outlets less than a foot apart at different heights. Not only is it weird having two that close, but the height difference drives me insane (not the first or last time I'll fix this kind of sloppiness around here... why, why, why?!?). Because this will be where the bulk of computer desk/mixer controllers/speakers/etc. will plug in, my plan was to remove one outlet and replace the other with a quad box/two outlets- essentially ending up with what's already there, but all in one place. I was picture happy today, so enjoy the hijinx.

Here we have both yanked out. I kept the one on the left because it was at the same elevation as the others in the room. Initially I figured one of the outlets would be linked to the other, but for some reason the one on the right had its own romex (that's what they call the type of wire and it's easier to type than "120 volt wire") coming from somewhere else inside the wall, so I just hacked it, pulled back the wires and methodically electrical taped it.

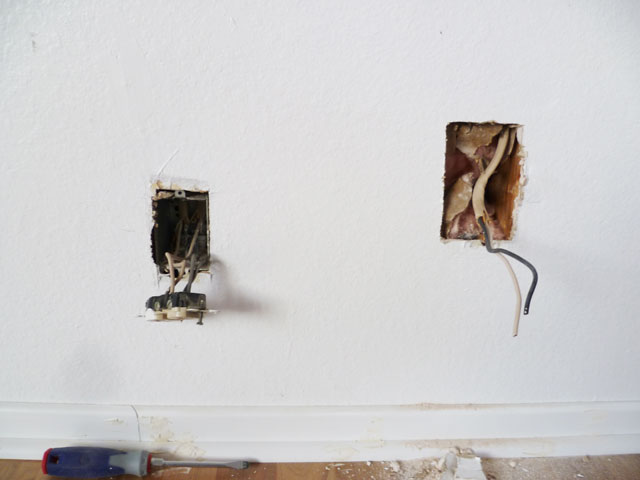
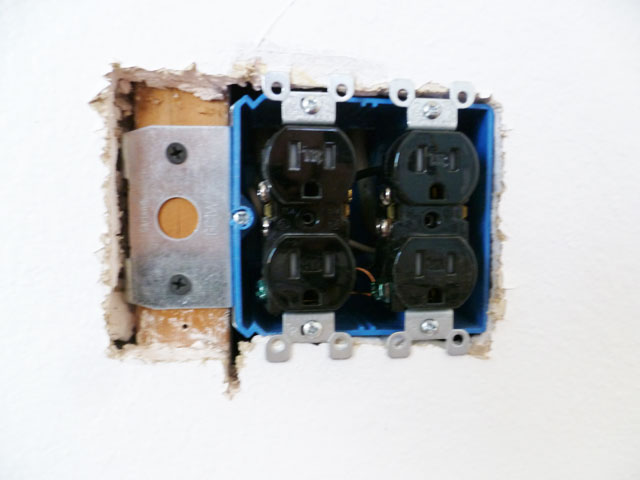
After removing the electrical box from the one on the right I used the same trick I've used a million times- take a piece of 1x2 longer than the size of the hole and drywall screw it at the top and bottom so you have something to attach the drywall patch to. I actually messed up and screwed the bottom screw in too far and broke the existing drywall, but I put it in nearby and sort of made it work. Once it's slathered in drywall compound, it'll strengthen it and no one will be the wiser. On the left you can see where I embiggened the hole and replaced the existing box with a quad one. You can get boxes for "old" or "new" construction- the "old" construction kind are for situations where the drywall is already installed and they use little plastic wings on the screws that lock behind the drywall. The nice part is that you don't have to make the hole in the wall any larger, but they sometimes don't mount very solid and/or square if the drywall is old and brittle (that's me). Since I'm a drywall-patchin'-motherf&*r-motherf*@r and thus not scared of making big holes in walls, I went for the "new" construction kind of box, this particular one having a nifty metal mount that goes right over the 2x4 stud which is super easy to screw in and very solid. As you can see, there are two sets of romex; they have to attach to the plugs and each other...

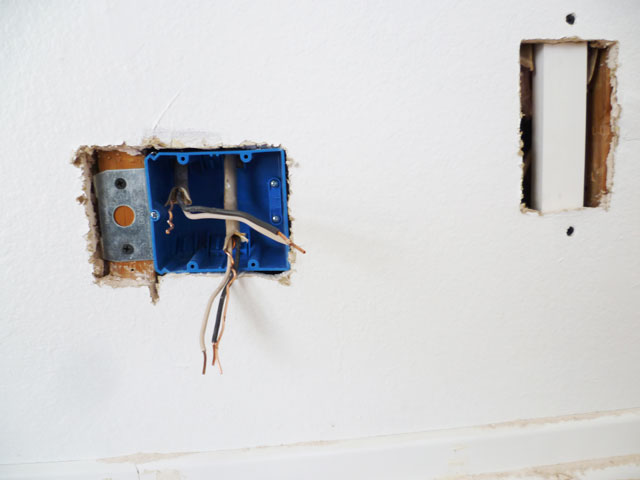
... which entailed the tricky wiring below. Keep that fire extinguisher nearby! Just kidding, it's actually pretty simple. Essentially ze juice comes in one set of the wires, goes into the outlet, travels to the adjacent outlet via the two wires at the bottom then continues back through the other romex cable attached to the other outlet. It's a called a parallel circuit, and yes, this will be on the quiz.

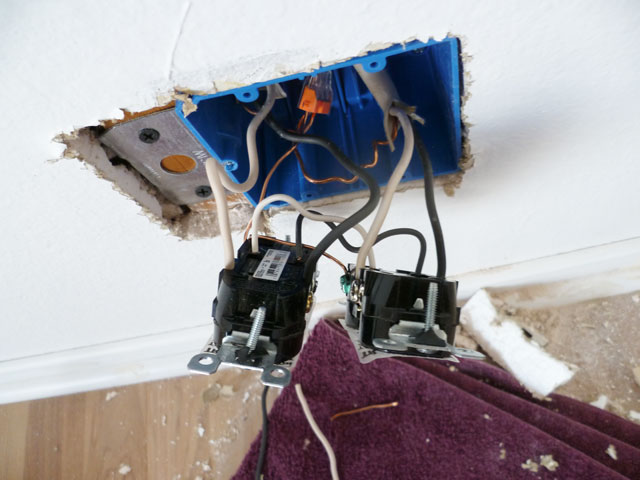
Here were are all wired, screwed in and snug as a bug:

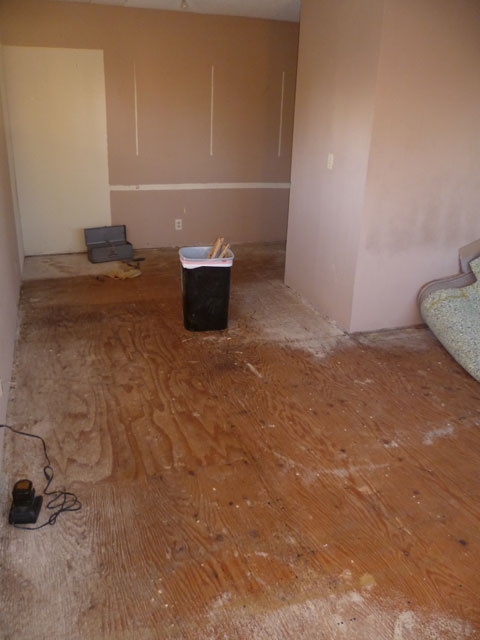
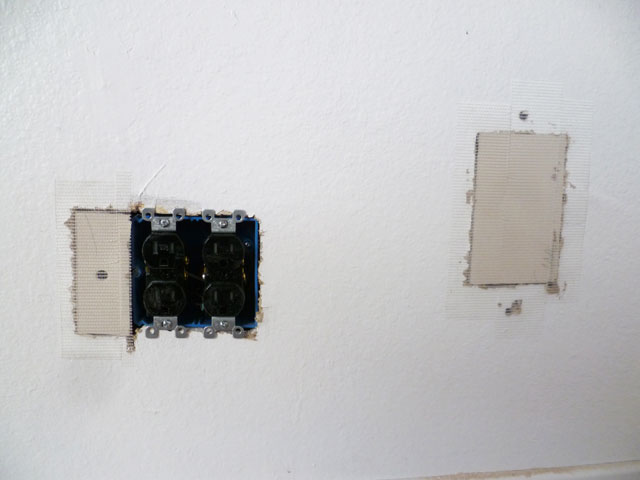
Now I gotta patch this mess. Here they are with drywall carefully cut to fit and mesh-taped over, ready for mud (my favorite Bad Company song).

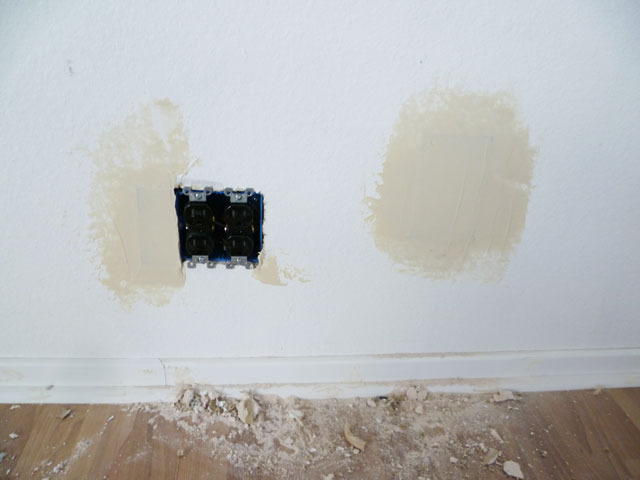
And here with aforementioned mud:


Now I wait 'til tomorrow, sand, repeat mud 'n' sand, paint, and Bob's your uncle.

I also replaced most of the remaining outlets and switches today. Yucko old:


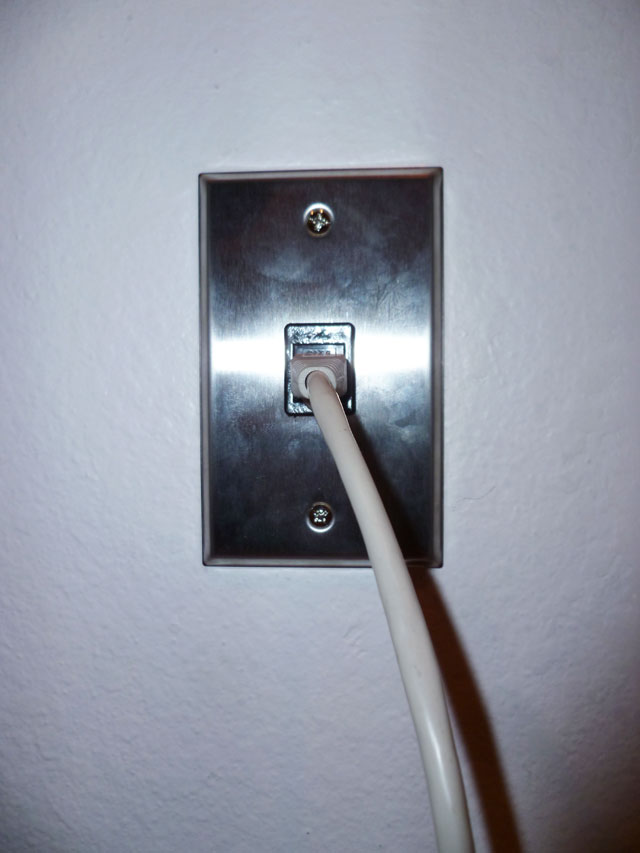
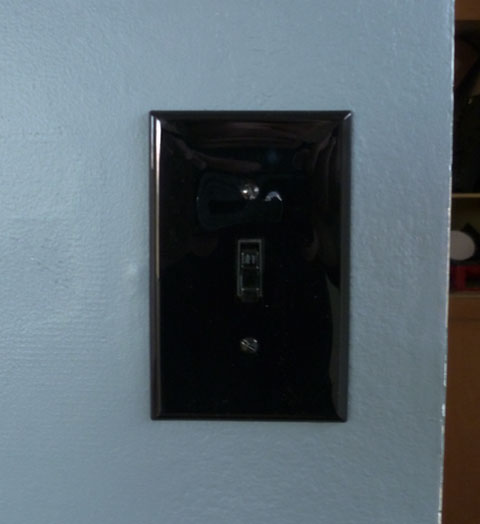
Perdy new. Funny looking chunk by the screw is photo weirdness, promise.


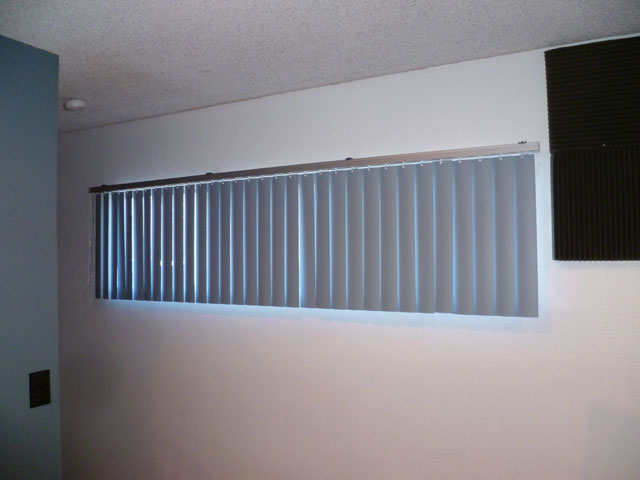
And the rest of 'em, at distance. I may actually spring for a bunch of brushed silver covers for all of them. Honestly I did black because I knew I'd have to seriously hack up one of them because of wall weirdness in the vocal booth (you'll see that later; I didn't do the ones in there yet), but I think the black looks a little weird on white walls. 


Super funny bar stool post-script...

I didn't really document the whole saga of the bar stools as it unfolded, because I didn't feel like typing it and no one would've read it, but the short version is that I ordered them from AllModern in July, they were insanely expensive ($240 each), it took two months to get them, and when they finally arrived, the metal inserts that the screws go into to hold the seats to the base were made wrong and wouldn't screw in. What followed was months of phone calls, shipping delays and much general frustration. To their credit, AllModern was pretty cool about the whole mess (the problems were almost completely the fault of the manufacturer). At one point they even gave me 30% off just as compensation for my troubles (and I didn't ask for it). After months of this madness, the replacements finally arrived last week, and the screws screwed as screws should screw.

Since I still have the defective bar stools, I called today to make arrangements to send them back. The guy at AllModern told me that since they were past some sort of time limit with the manufacturer, I could just keep the defective ones, and openly suggested I try and fix them. I believe they could be fixed with a tap and die set (that's a thingie that threads things for screws, since they failed to thread it properly from the factory). I knew this all along, but I wasn't motivated to try and fix theoretically new bar stools and didn't want to risk messing them up if they had to be returned. Now that they're free, my attitude has understandably shifted.. if I can fix 'em, I'll throw 'em on ebay, make a bunch of dough on them and effectively get my bar stools for next to nothing.

Page 1 ... 2 3 4 5 6 ... 22 Next 5 Entries »