SEARCH
Mid-Century Malaise – "SHOW ME PICS" Version

Sunday
Dec222013

Out with the new, in with the old

For those of you who read my blog, you've seen plenty of pics of my kitchen table. At casual glance it appears to be a classic Eero Saarinen "Tulip" table, but in reality it's a cheapo Ikea Docksta knockoff. I bought it used for next to nothing before I moved to Vegas, and at the time I thought it was a swingin' deal, but two years later I realize it's a bit junky. Unlike a real tulip table, the base is a textured plastic seemingly engineered to collect and retain as much dirt as possible:

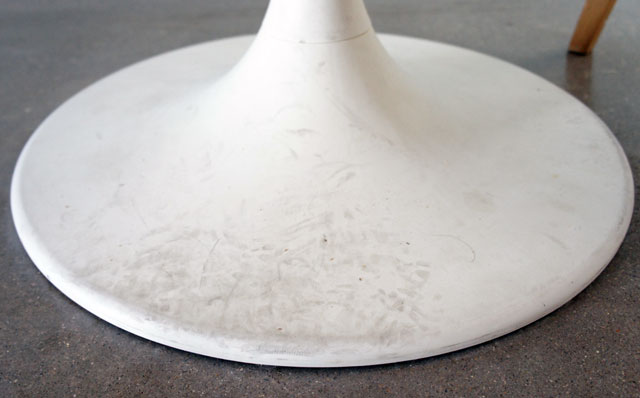
Yum, right? You can never get it totally clean because of the rough texture. Additionally, the whole thing isn't really substantial enough, so it's wobble-prone... careful with that coffee, bub.

While perusing the list o' Craig this week, I found what was being sold as a "1950 Knoll Saarinen table, not sure if authentic" for $400. The guy was cool and explained that it was sold to him as authentic, but it didn't have any stickers or indications, so he wasn't sure. It did, however, have a hefty one-piece aluminum base (unlike the Ikea one, which is neither hefty, nor one-piece). I googled how to identify the real deal and came up with two great guides. When I went to look at it, it failed- there's a big wood disc with screws around the perimeter; real ones don't have any visible screws, but the top still screwed into a big rod so the disc part could've been added. In other words, it could be authentic. And it wasn't a 1950- the original was released in 1956. The base clearly had been refinished- not a super great job, but passable- and the top had one little mark, but again, nothing terrible. The guy also had a brand new top with plastic still on it, but movers had chipped the side (probably repairable). Anyhow, $300 later, it was mine, both tops included. And holy crap is that base heavy to move!

(BTW, for reference, a brand new, real one of these tables will set you back a cool $2000 for a 42" like mine. Yikes!)

For comparison, my old Ikea one:

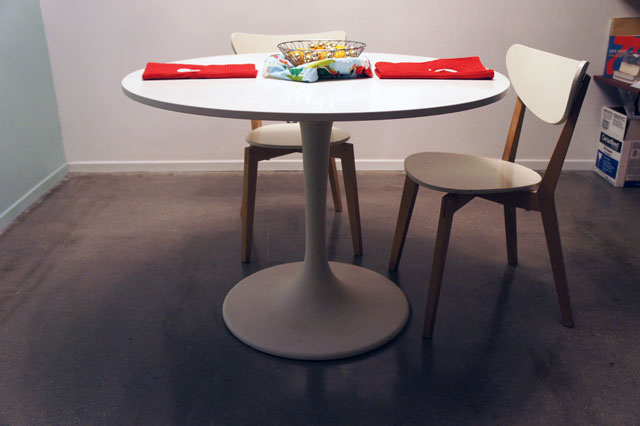
And the new vintage one:


Note the far more elegant curves... the base comes to an almost sharp point at its very bottom and the "stem" is much slimmer. It's hard to see in this pic, but the top tapers gracefully at its edges, whereas the Ikea one has square edges. And the vintage one has a much smoother and shinier top. Now all I need are some matching chairs, like so:

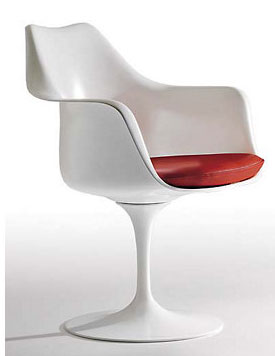
One can get knockoffs for around $200 each, but they're ABS plastic (yuck). The real deals have fiberglass shells with aluminum bases (and $1700 new... each!). I've been watching ebay forever to find a pair, but it's hard to find 'em cheap. The alternative is to get knockoffs by Burke from the 60's or 70's, which are similar and usually a bit cheaper, but they typically have "propeller" bases that I don't like as much.

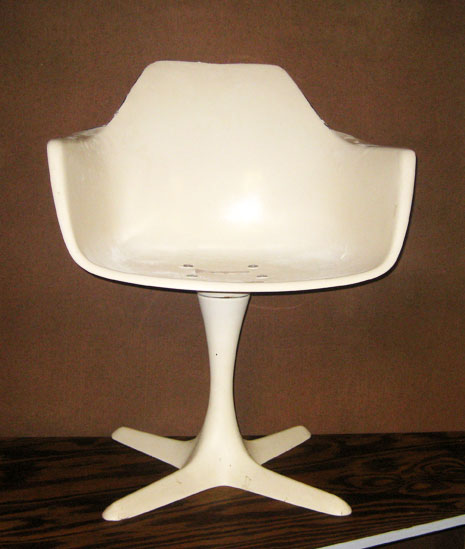
Here's a gaggle of dorks perched in Burke chairs below from some lame 60's TV show:

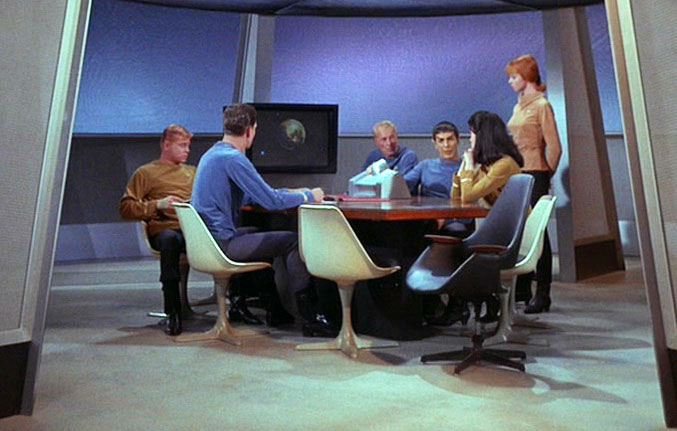
... which probably drove their value up.

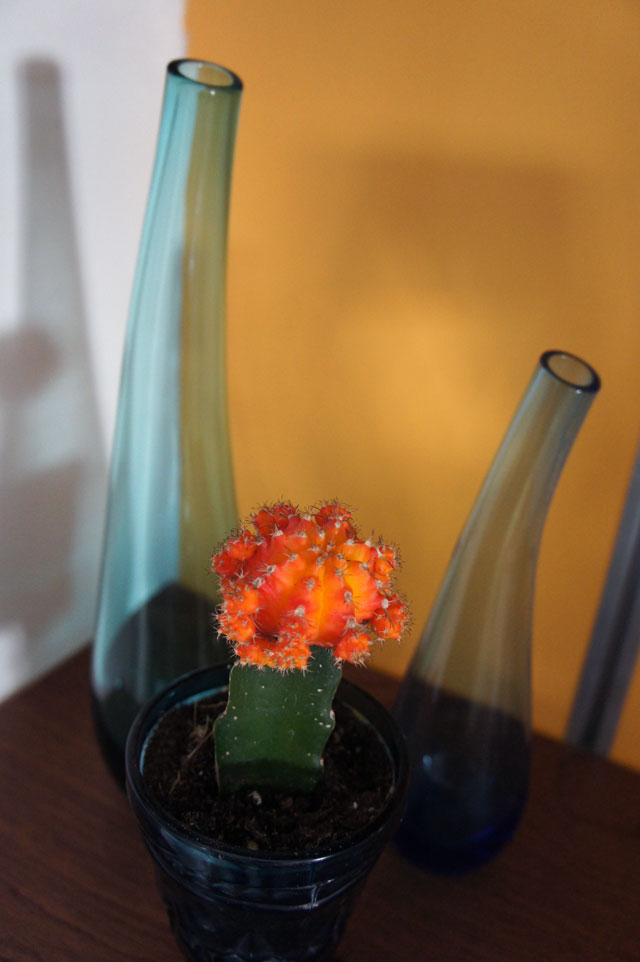
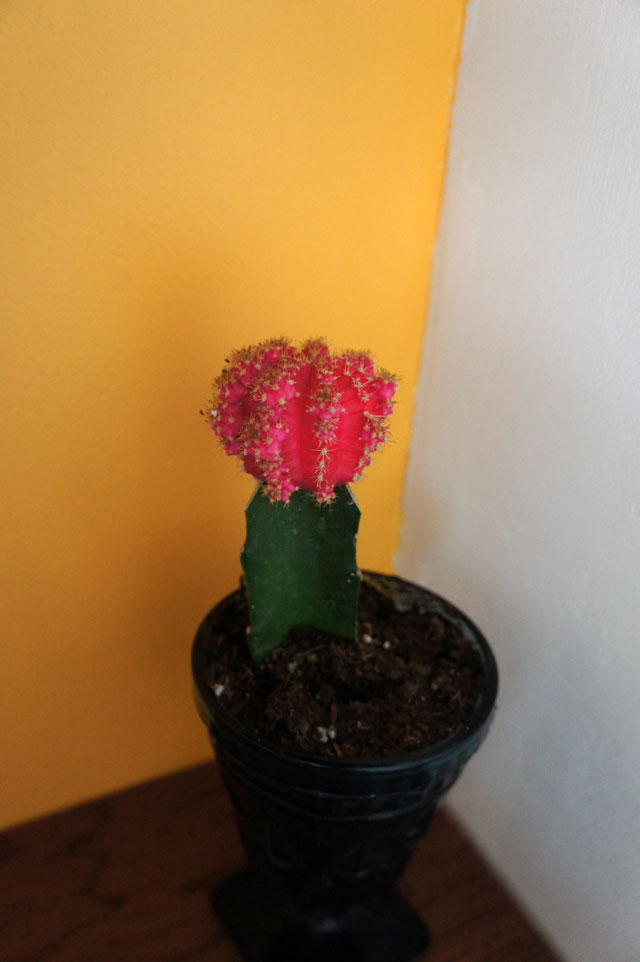
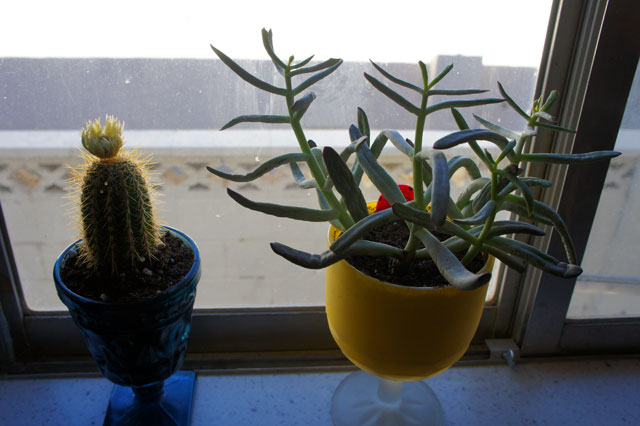
Speaking of 60's spacey crap, Kim recently went on a terrarium mission to fill our kitchen with regional succulents (from the exotic locales of Walmart and Home Depot). We found the nifty 6" tilt bowls online at the also exotic Crate & Barrel. This was her pet project, but my only qualifier was that the plants had to look like stuff that would attack Will Robinson on Lost In Space (see how I sort of contradicted myself there?). Show 'n' tell! (did I mention I love my new camera? Shallow depth of field warms the cockles of my little heart.)

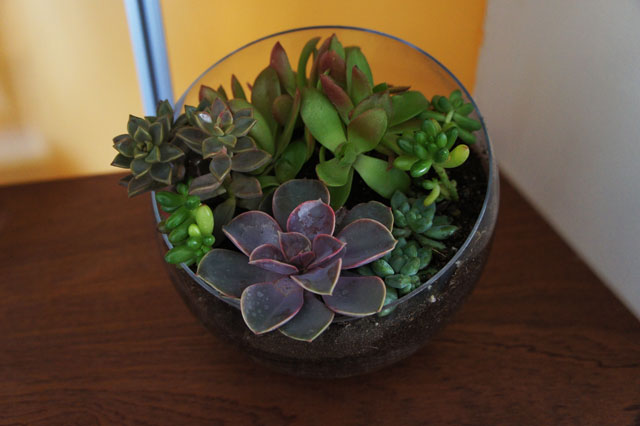
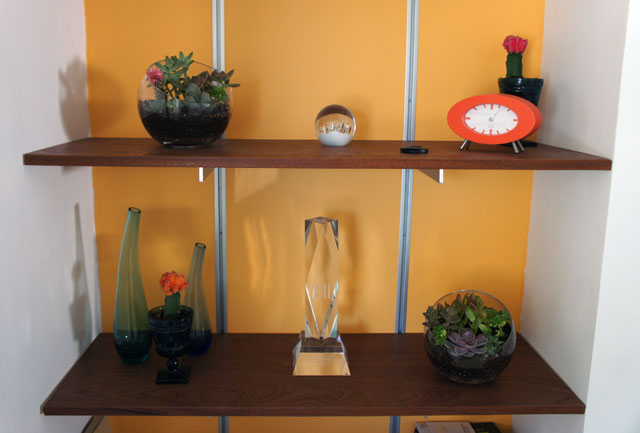
Here's the group photo. And yes, dummy me left the lens cap sitting on the shelf. Doh.

Monday
Dec092013

toekickin' back

In case you're saying to yourself, "isn't he ever gonna be done with stupid kitchen already?!?", I'm probably saying the same thing, so I beat you to it. It's really almost there, I promise. However... I've been putting off doing the stupid toekick panels forever (those are the little pieces underneath... that you might kick with your toe, get it?). It's such a long and stupid story, but 1) I knew I'd need to borrow John's compound mitre saw (which I've had in my possession for at least six months), 2) I was gonna paint them to try and match the floor (which was stupid, because the stock Ikea brown-almost-black color looks fine), 3) laziness. Anyway, I finally got to it yesterday, but I still haven't done the island, for which I have a sort-of explanation later. Most of it was pretty easy... had to thoroughly vacuum underneath the cabs where dustbunnies have been accumulating for roughly a year, then had to cut to size and install Ikea's little clampy system that works like this:

The little rectangle thing has a ridge that slides into the back of the toekick panel (or "plinth" in Ikea-speak), then the clamp part slides onto that and you align the whole mess so it pops over the leg. Like lots of Ikea stuff, it's a good idea in theory, but the el cheapo implementation falls a little short. First of all, aforementioned rectangle w/ridge frequently just falls out of the slot. I remedied this by squirting construction adhesive in the slot. Also, if you don't have the plastic clip aligned just right with the leg, the clip breaks. The good news is they include a whole set of this mess with every leg and since the back legs of any given cab don't have toekicks, you end up with lots of extras, so no problem there. This little 15" section is the first one I did (I didn't do them in front of the refrigerator- the bottom of its frame sticks out a little too far anyway):

Hard to see in the pics, but they also give you a little clear plastic "lip" that goes on the bottom that I presume helps prevent liquids from seeping in. This needs to be trimmed correctly, but can be done with sharp scissors. Here's the rest of that wall. Sorry about the crummy mat- our upright vacuum is wonky these days :(

I didn't use the standard plastic legs for the end cab with the oven/microwave because it weighs over 200lbs fully loaded, so I upgraded to metal legs. These won't work with the Ikea clips, so I cut some 2x4 blocks and screwed them from the top with countersunk drywall screws, giving me something to attach the panels to. The tricky part was setting them back exactly the correct amount so the panels would all line up correctly. Once I had the 2x4's in place, I used my pnuematic nail gun to attach the panels. It leaves little dents, so I'm gonna do a little wood filling and paint touch up (need to match the color first).


I still haven't done the island- I painted a couple of the panels gray (long story, but later realized standard color was better) and need to repaint them back to blackish-brown, then I'll cut and mount them too.

Saturday
Nov302013

do you want to hang my picture?

Not even sure if this qualfies as "renovation" or is blogworthy, but since my neck hurts like hell (ongoing back/neck old age stupidity) I decided on the relatively unstrenous task of hanging pictures. I have no idea why I didn't do this a year ago. First off is my Ikea Victor Vaserely special. Nothing like sixties op-art to make your place look, uh... sixties.


... a relatively rare Clockwork Orange print.

... and an original THX-1138 movie poster that I got a long time ago when it was probably worth a lot less. BTW, this is the greatest Lucas film, his later stuff (the names of which escape me...) is crap :)

Friday
Nov292013

range hood radness

Roughly a year after the bulk of the kitchen reno was completed, I finally got the damn range hood thing up. There's been a couple of factors (that's a fancy word for "excuses")... I needed handyman Keith to do it, as I knew this was a little beyond my abilities and we knew there would be some sort of attic/rooftop factor involved, so Keith didn't want to do it in the blaze of Vegas summer. We also knew this would be a big undertaking (took two days) because you have to run power (which turned out to be super easy), make a big hole in the roof (and hope there's nothing in the way), and figure out solid way to mount this big chunk of metal (not so easy with a wall of glass tiles behind it).

First thing was to cut a big ol' hole in the ceiling to survey the obstacles we'd be dealing with. As it turned out, I got real lucky. Because you want it exactly centered over the cooktop, there's pretty much zero leeway as to mounting location. If there was a ceiling beam directly up there, I could've really been in trouble. Keith explained that these days they usually take the locations of vent fans into consideration when designing homes, but who knows where the oven initially was (the kitchen had been radically remodeled long before I got here) or if there ever was a fan that vented outdoors. Anyway, I super-duper lucked out because the only obstacle was a smallish brass water pipe and were able to avert it by taking the eight-inch diameter vent duct down to a six-inch (the thing you see in the pic is actually the flexible gas line I had installed for the cook top, but it actually wasn't in the way). Only thing is now the initially hole in the ceilng was two inches bigger than it needed to be, but I shoved fiberglass insulation in the gap at the end, so that worked out fine.

We were also going to need AC power, and since this wasn't built into cabinetry, it's not like you could just plug it into a hidden outlet. We got super lucky here, because directly behind this wall in the garage was an abandoned electrical junction box with conduit coming down from the ceiling. Upon opening it, we discovered live 220V AC (don't worry, we discovered it was live with a nice, safe voltage "sniffer" device), very likely left over from before the upstairs add-on/laundry expansion... in other words, there was probably a washer/dryer out there at one point. We figured out the correct breaker and shut it off (same as the pool pump... ugh, this place!). Once we pulled it out of the box and removed the metal conduit, we had plenty of slack to route it over the top of the wall on the other side, hence the picture above. Since we only needed standard 110V, we didn't use one of the "legs" (aka, wires).

We also had to solidly mount it. In my head, I always envisioned the thing hanging from the ceiling, but in reality it sort of just hangs on the wall like a picture- it's mainly held up by large bolts going through keyhole-style holes (there are two more holes for additional support). Of course there weren't studs exactly where we needed them, so Keith did some tricks adding 2x4 braces on the side of the wall (complicated by a weird double-wall because of the way they did the additions). This, of course, meant more cutting out chunks of drywall...

... thanks Keith, I LOVE PATCHING DRYWALL SO MUCH! There was another nice-sized chunk in the garage too. Grrr! It's a little hard to see in the pic, but Keith also had to remove a couple of the tiles, because after some research, we learned that it's really hard to drill glass tile without screwing it up (you need special bits, but even those are apparently a hit or miss affair). The top two didn't matter because they wouldn't be visible anyway, but there were two more on the bottom that would've been very visible, so on day two of install, Keith brought a little Makita rotary cutter thing and successfully trimmed down two tiles on the wall so we could get the screws in. Don't try this at home, kids.

BTW, as some of you may have seen on my Facebook page, unpacking this thing was the most awesome day of the cats' lives:

Hey, progress:

Mighty ugly without the metal shroud, eh? BTW, it's not curved, that's just the wonder of my camera's zoom kit lense (if anyone wants to buy me better lenses, let me know). Anyhow, here you can see the eight-inch to six-inch reducer we installed (I have no idea why they went so big in the first place, seems like massive overkill). You can also see the bracket up top on the wall, which the pretty square telescoping shroud cover attaches to. We didn't have "no stud behind" problems for this because there's double-stacked 2x4's at the top of the wall to screw into. I took the pic before I did it, but this is where I stuffed fiberglass insulation into the gap you see between the duct pipe and the ceiling. By this time Keith had already cut a six-inch hole in the roof with a jigsaw, and we bought a plastic roof vent dealie:

I'm too lazy to Photoshop all that extra white out of the picture... anyway, you put that guy on the roof which basically keeps rain, insects, pidgeons, helicopters, etc. from falling back into the house. The only other thing I should mention is that every square inch of soon-to-be-fingerprinted stainless you see was covered in plastic which I had the misfortune of removing. It's on there pretty good and is totally a no-fun job. The good news is it's all done and works swell- I made a nice smoky 'n' buttery tuna melt in a pan and sucked all the fumes right out. It's a tad a noisy on full blast but the other two speeds aren't too bad, and this was the most sleek and compact one I could find that wasn't $1000.

Saturday
Nov232013

insert your own "how many ____ does it take to screw in a lightbulb" joke.

If you've read my blog, you've probably seen my swell retro Sputnik chandelier lamp in the kitchen. Wellz, when I originally got it, I cheaped out because I didn't want to spend a bunch of bread for the proper chrome-top bulbs. I got around this by getting some "string lamps" at Target which happened to have 25 five-watt bulbs that fit, and they were only $12 (i.e. about 50 cents a bulb, such a deal). Doing a little math, 25 five-watt bulbs gives us 125 watts of light, which is usually enough, but not really. Between the not-bright-enough and my desire for it to look cooler, I finally decided to do it up right and ordered a bunch of chrome-top bulbs (which I managed to find online for about a buck a piece, so not so bad in the end). Here it is before:

and after... BTW, unscrewing/screwing in 25 bulbs is as fun as you think it isn't.

Sexual home magazine shot. If my entire place looked this spiffy, this actually would be a home magazine shot (maybe some day...):

Now the (un)fun part. The mirrory-awesome bulbs are physically slightly larger. which looks a little nicer (I didn't realize this 'til they arrived) but you can only get them in two wattages, 25 or 60 watt. Ideally, I wish they came in something around the 10-15 watt range, but they don't, so I went with the 25 watters. Whipping out Mr. Calculator, that's a rather bright 625 watts total... I was definitely going to need a dimmer (as a side note, imagine if I went with the 60 watt bulbs- a retina-searing 1500 watts!). So... I found me a nice vintage-lookin' Lutron rotary dimmer online (forget about getting this stuff locally in Vegas), which would be this:

Because I already have a three-gang switch on the wall, I wasn't gonna use the plate, and my plan was to mask the metal insert and rattle-can the knob black. What they don't tell you is that the entire thing has a large heat sink that sticks off the wall about a half-inch (the included plate snaps to this). This is all fine and well if it's a single switch on the wall, but makes it totally unusable with a multi switch plate. You end up with this hot mess:

I went off to Home Depot to find something that would fit correctly, but being Home Depot, almost everything they have 1) is white and 2) is designed for the large rectangular cutout used for most modern switches and outlets (i.e., not mine). The only "standard" old-style rotary dimmers they had were rated for 600 watts, and as mentioned, my 25 bulbs come out to 625 watts. So... back to Amazon to find something without big-ass heat sink assembly. In the meantime, we have a really cool looking lamp and ghetto dimmin'.