
Super duper mega outdoor remodel. Part one of many.

I had been planning on renovating the outside of my place since I moved in, but frankly, there were so many things to be done, many of which depended on each other in various ways, that I simply put it off forever. To make a long story short, my pal John put me in touch with Sammy, the multi-talented contractor who had painted his house, and he agreed to take on this very huge project consisting of:
- paint the house
- repair and stucco front, side, and yard cinder block walls
- remove decrepit vinyl siding from house and stucco
- construct a storage closet in my porch area
- build a wood deck in yard
- replace various doors and windows
- jackhammer and dispose of all concrete on sides of house
- resurface pool and patio areas
- remove/redo entire landscape
- install irrigation and run 12-volt power for Malibu lighting
As you can imagine, this was an immense undertaking, and I'm happy to say that it's almost all complete. It took about two months of contractor Sammy (and his sometime assistant Lorin) busting their butts to make this happen, and they did an amazing job. I have hundreds of photos, so I'll try to break this up as best as I can. I won't attempt to show things in the correct order because the contractors jumped around a lot; instead I'll try to show sections in order so it'll make more sense.
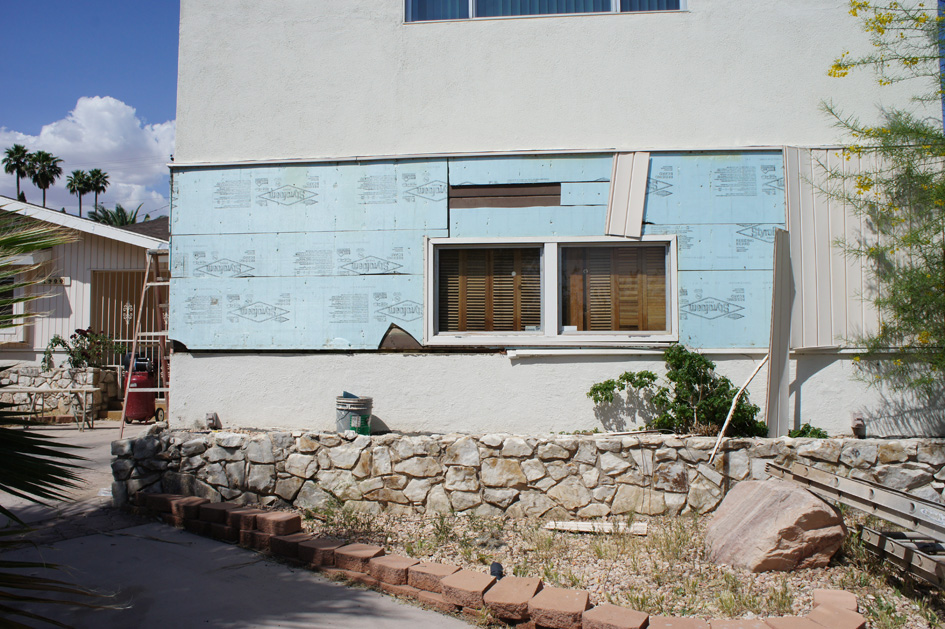
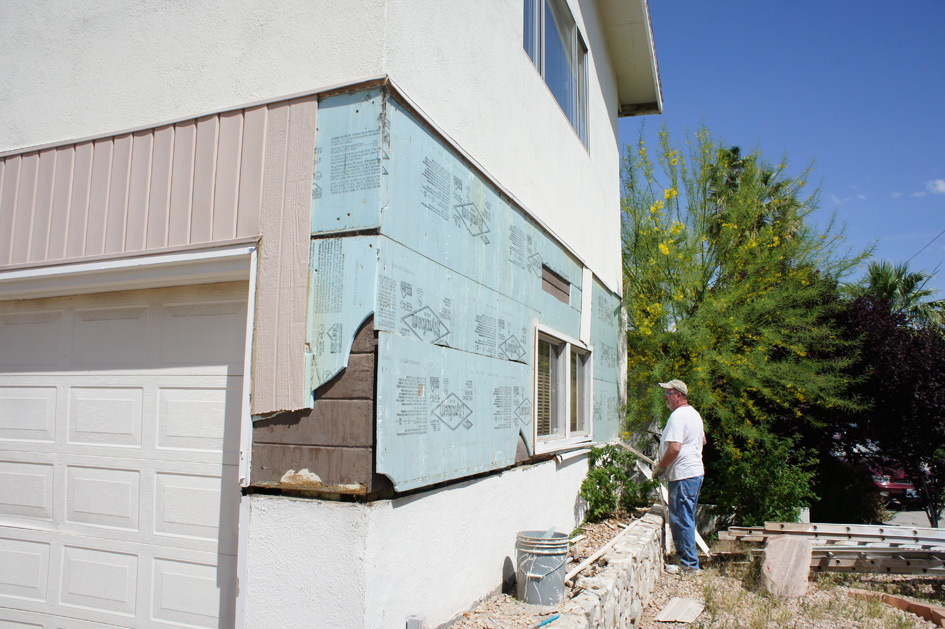
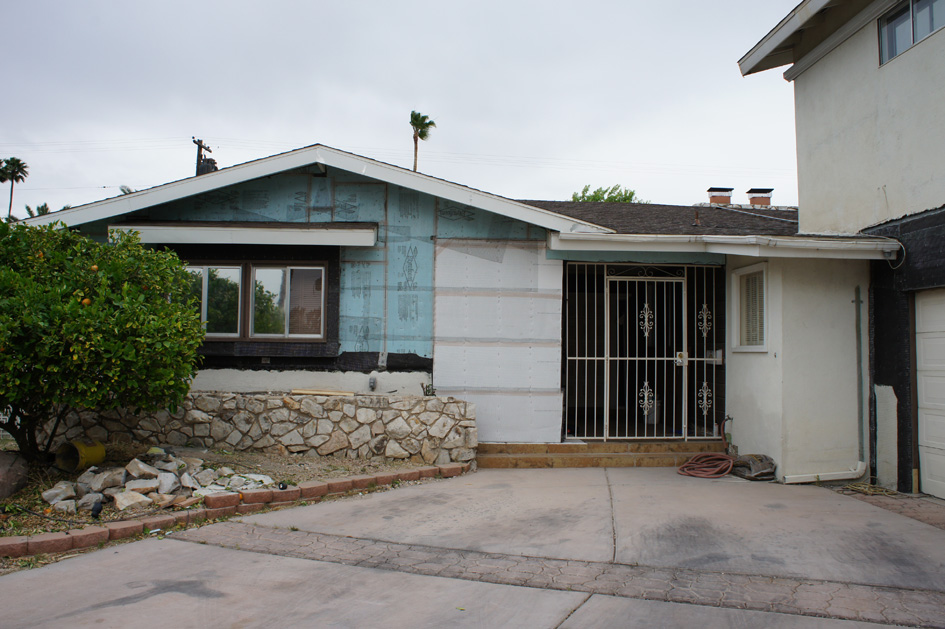
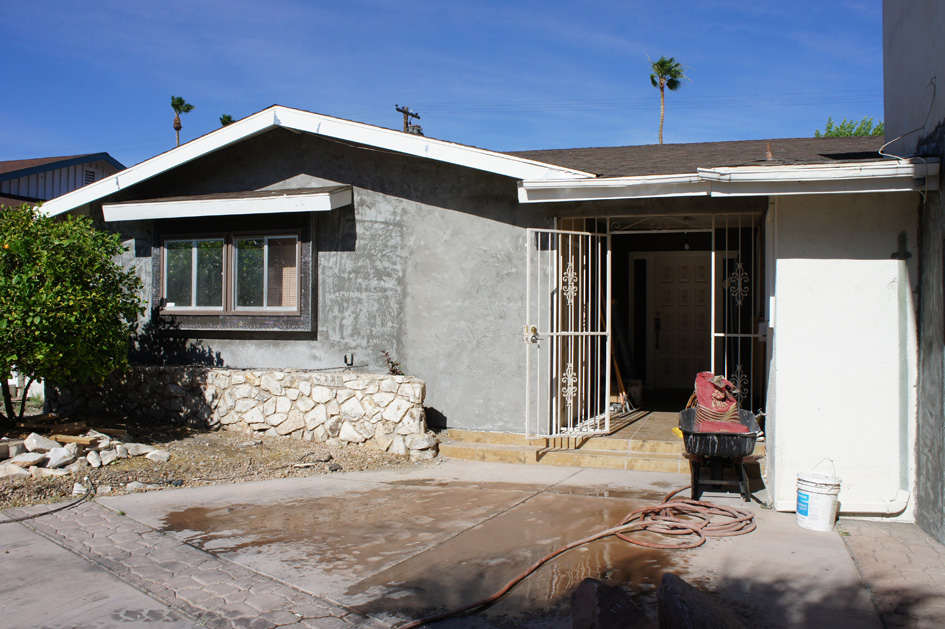
First thing they did was remove a bunch of vinyl siding and apply stucco in its place. I presume this stuff was pretty nasty even when it was new, but now it was old, faded, and prone to cracking apart. I felt that stuccoing where it was would simplify the lines of the house. I didn't take a picture before they started, but the vinyl siding is pretty visible as they tore it off. Unluckily for me, there was no existing stucco beneath it.
See the window in this pic? This is actually my garage; I thought having a window in there was real dumb, so I had them remove it and stucco over its previous location.
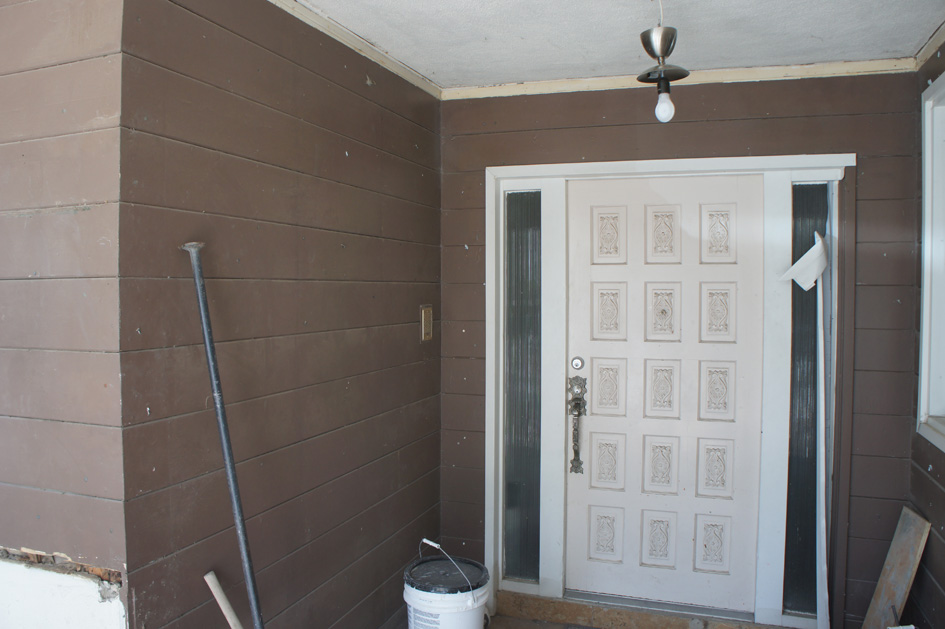
You can really see the vinyl crap in this pic of the entry way. Since the that entire "nook" on the left is wasted space (especially with the gates), I decided to have them wall that off and create a storage closet.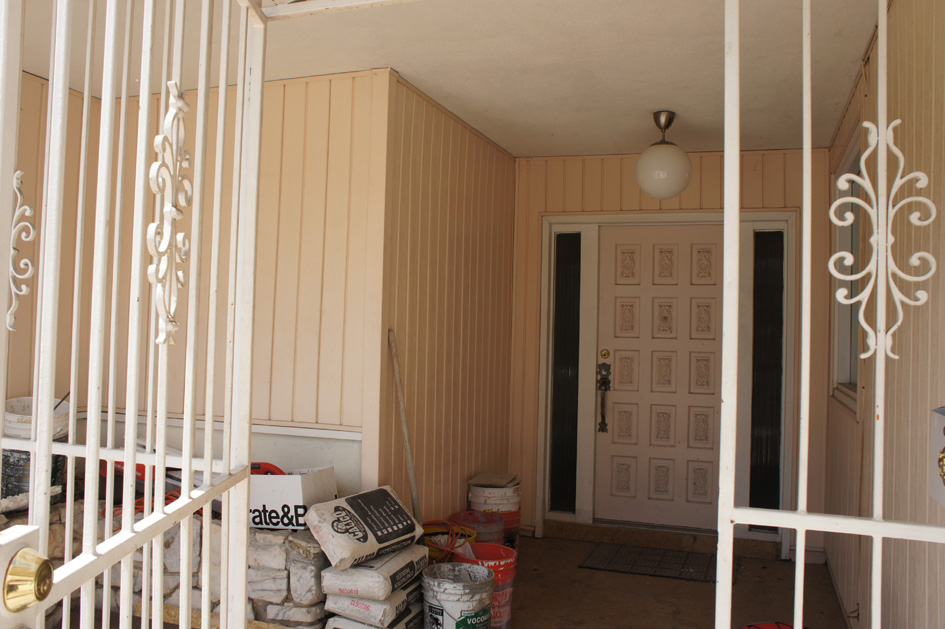
As you can see, there's a limestone bed there, so they had to chop that out, and remove the section of the gate in front where the wall was going to be. Noisy there!
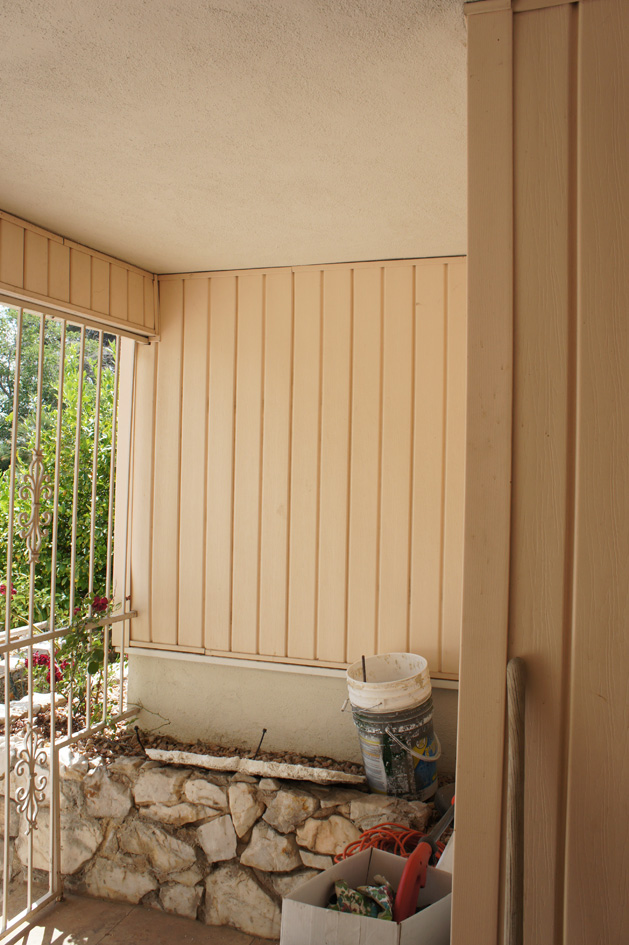
To my surprise, removing the vinyl in the entry way revealed tongue-in-groove wood siding. My original intention was to stucco the entire entry way, but the wood was in decent shape, so I decided to keep it and paint it. Would've been super nice if it was a natural wood tone, but stripping that stuff probably would be more difficult than tearing it out and starting over again. Maybe in the future?
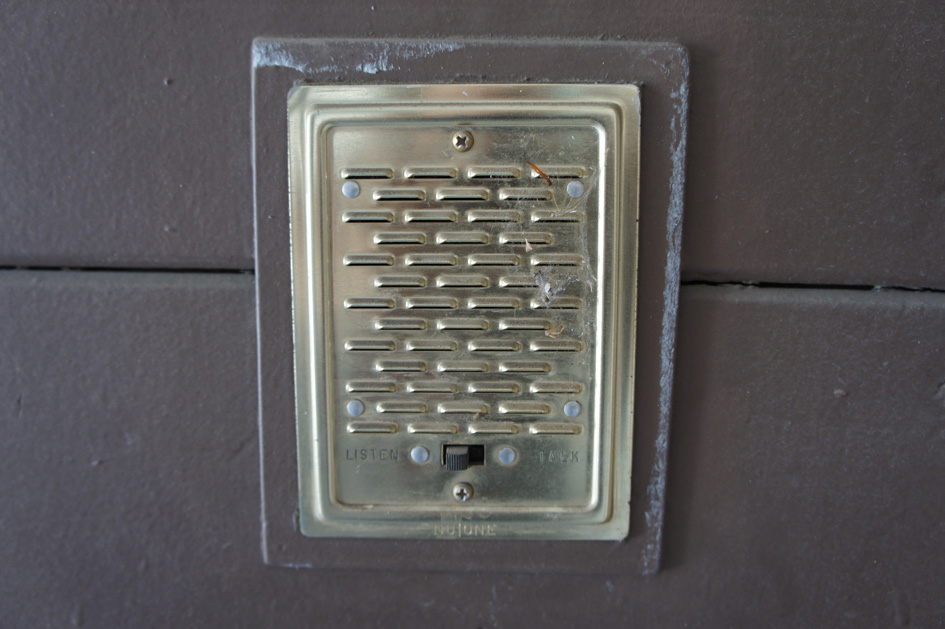
Betcha don't have one of these. I could never figure out why there was only one intercom in the back of the house. Now I know where the other was. It would've been fun to get this guy working again, but because it's behind the gates, it would've been useless, so I tore it out and painstakingly patched the hole with some of the new tongue-in-groove siding we used for the new storage closet facade (i.e. careful cutting and shimming). I'm proud to report that the patch is almost invisible.
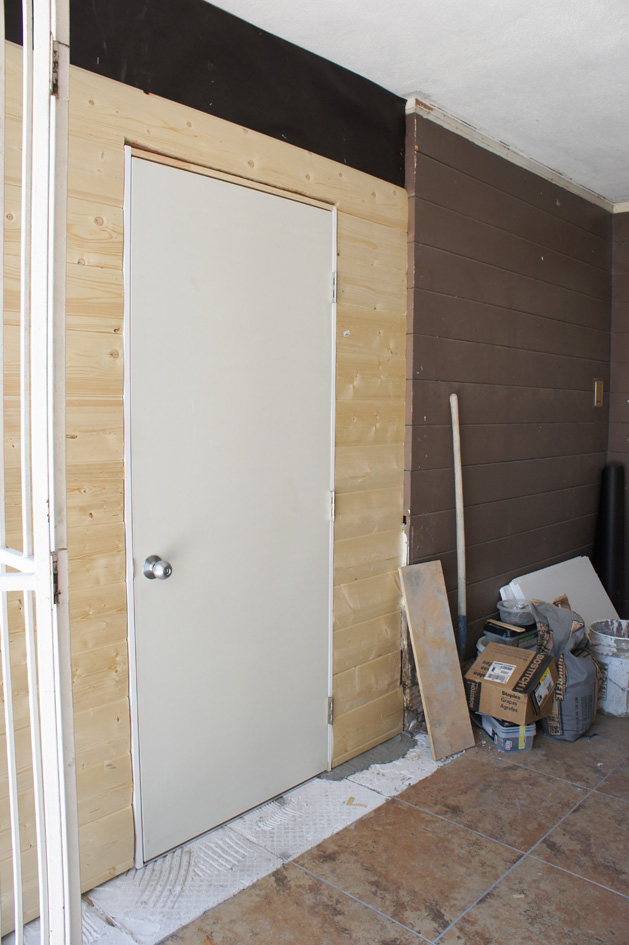
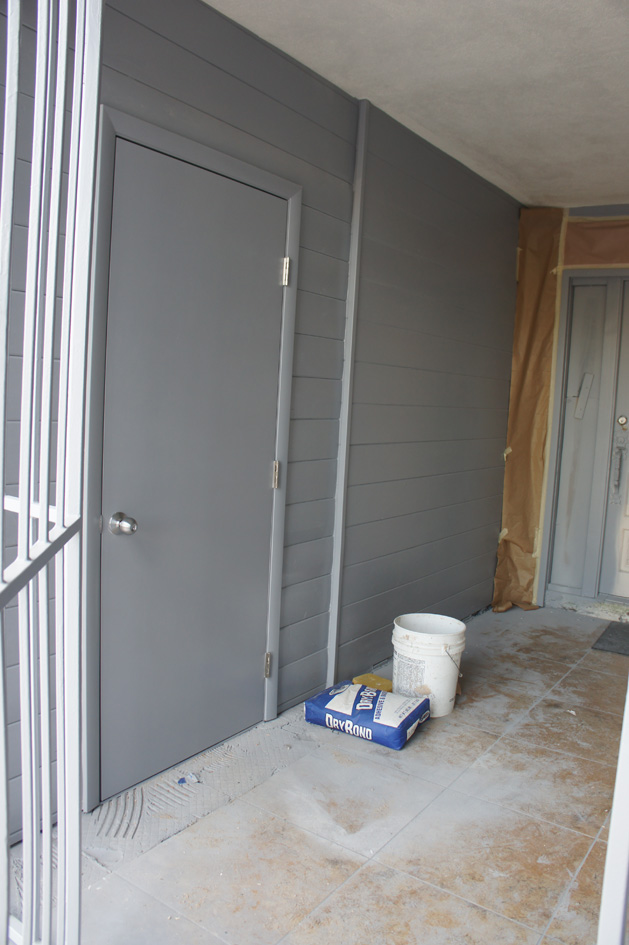
Pow! Now there's a storage closet. Contractor Lorin framed the walls ridiculously fast (and had to account for the weird slope of my entry roofline). They also got me a solid-core door which I spec'd to open outward in order to maximize the space. Door knob is a Schlage Orbit in brushed chrome. I ordered a LOT of Schlage knobs and locks and now every lock in my house uses the same key. We used standard tongue-in-groove siding from Lowe's which matched pretty well. (not exact, but the original was an oddball size).
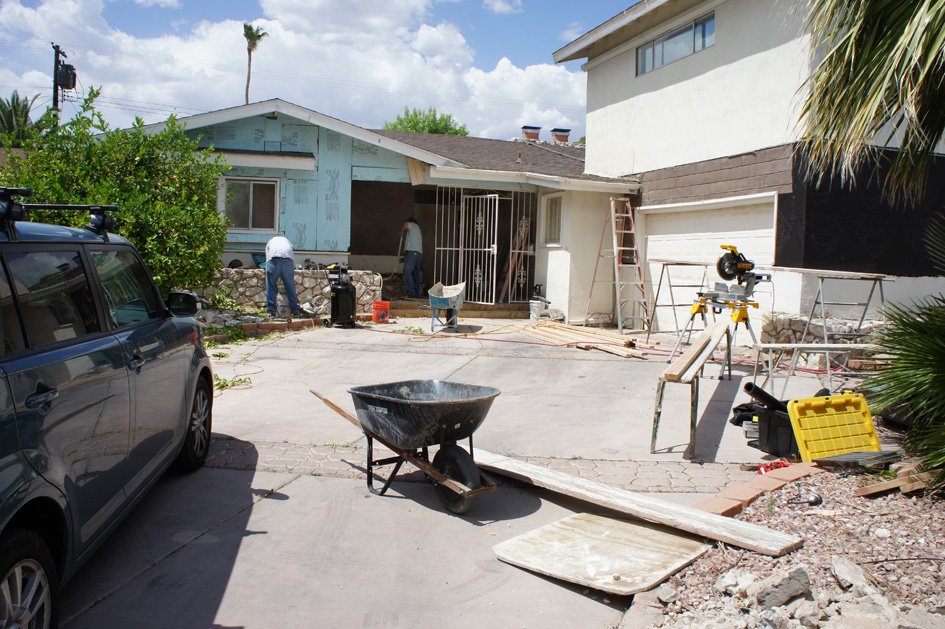
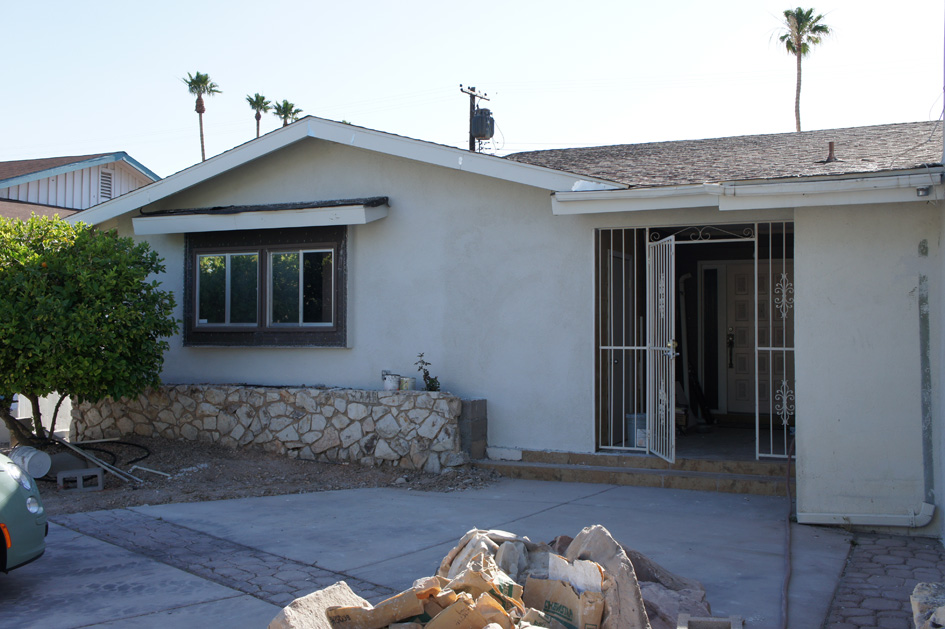
This should give you an idea what a mess the place was becoming. I bet the neighbors were freaking out...
Here you can see they've already built the wall where the closet will be (it's the white foam part... that used to all be gate/porch). At this point, they've attached foam and metal lathe to attach the stucco to.
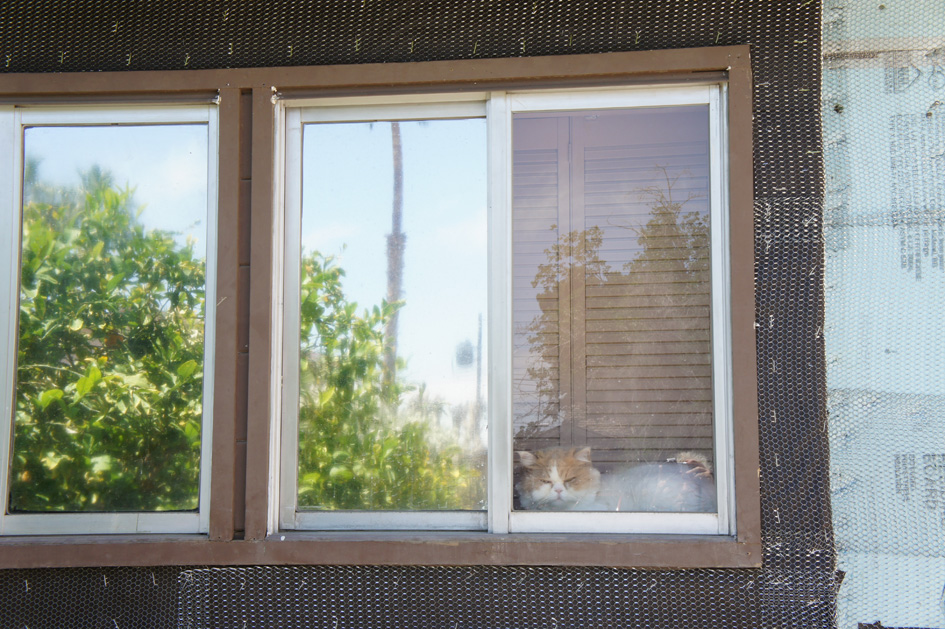
Hello Lester.
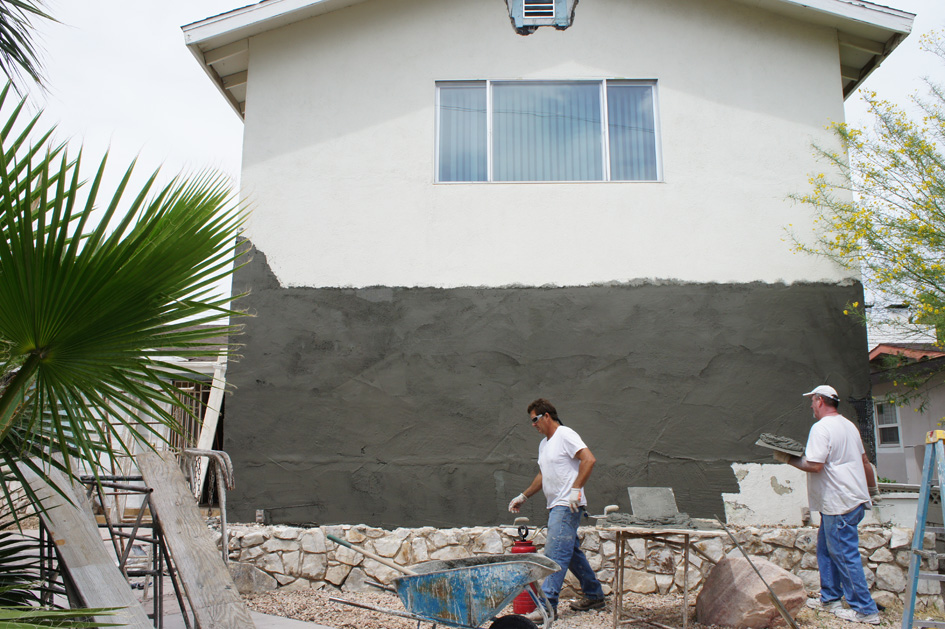
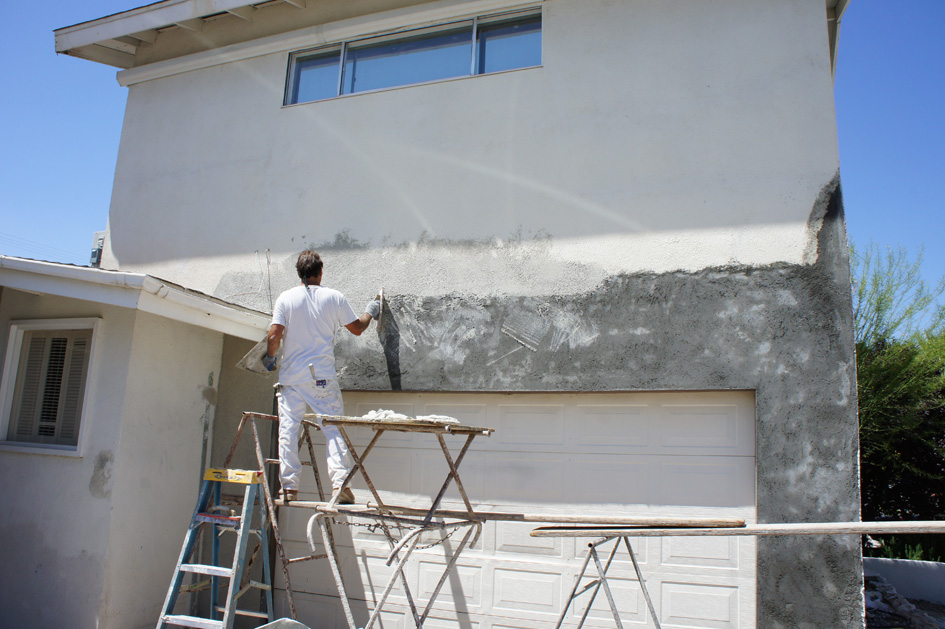
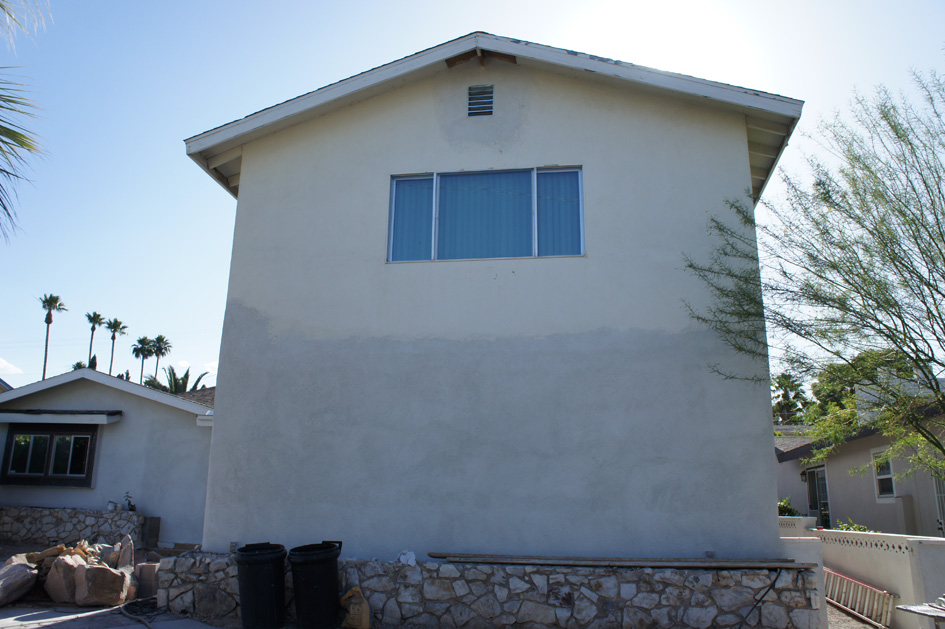
I'm gonna jump around a little to give an idea of what things looked like once the stucco went up. This is what they call the "brown coat" (even though it's really more gray). It's a thick coat to get everything leveled how they like, and later they'll apply the texture coat which gives the desired... you guessed it... texture. You can also very clearly see that the first-story window is gone.
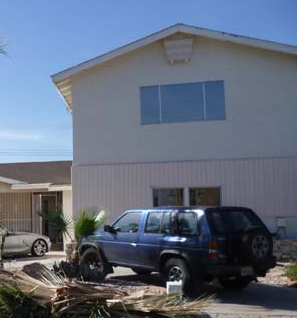
If you look at the very top of the above pic, you can see a shiny new attic vent. There used to be a "faux bird feeder" as I like to call it. In my minimalist mind, this was an ugly and pointless flourish, so I had it removed. Sammy destroyed it with a sledgehammer in about five minutes flat (he likes to break stuff). Here's a not-very-good old pic of it I dug up:
Other half...
... and the garage side.
aaaannnnd with texture coat. Starting to look like a proper bland beige Vegas home, but trust me I'm gonna screw that up big time.
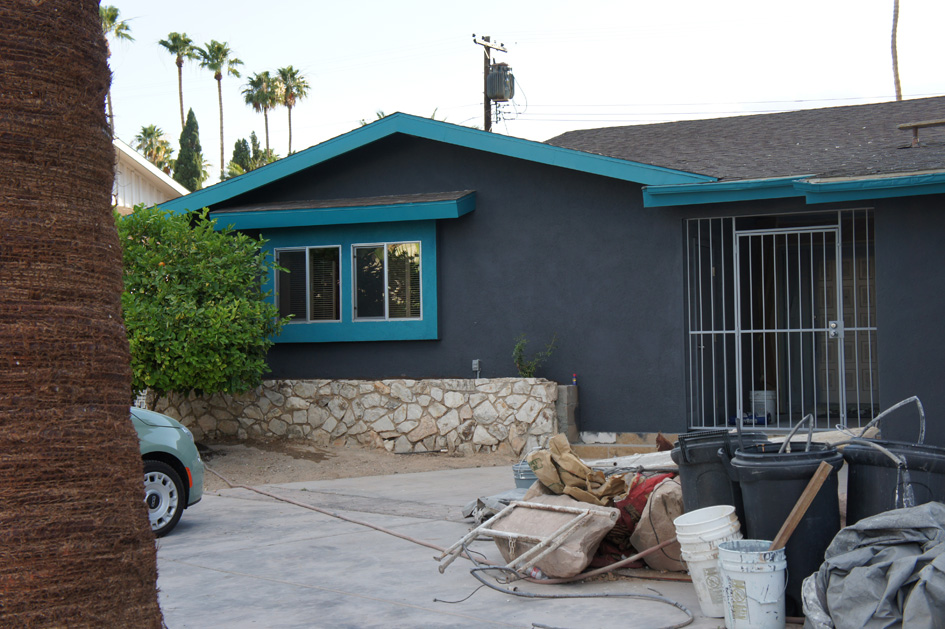
I see a beige house and I want to paint it blaaack... WTF? Ok, not really black, more like a charcoal gray. It looks sort of like a haunted house at this point, but trust me, it gets better.
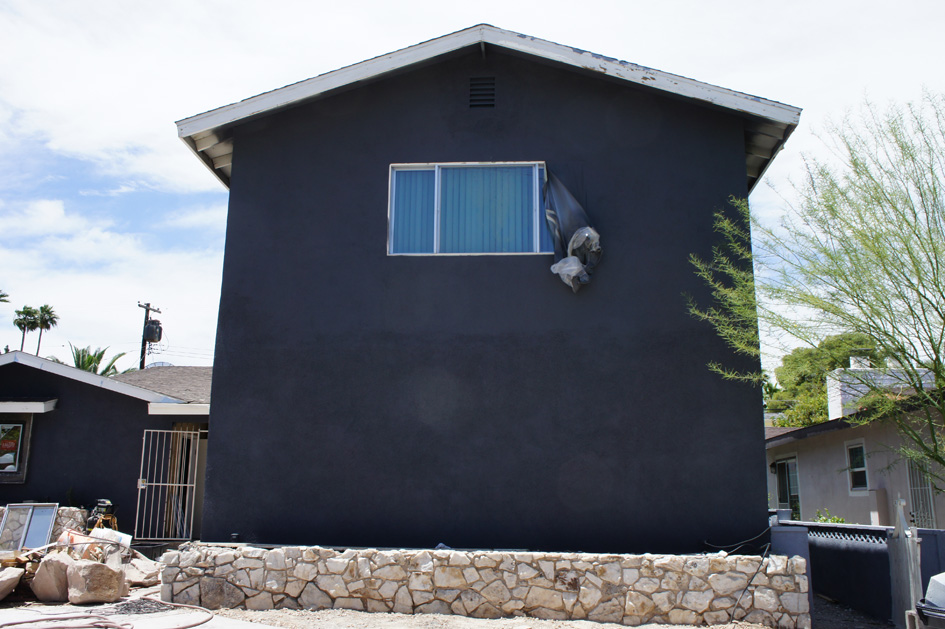
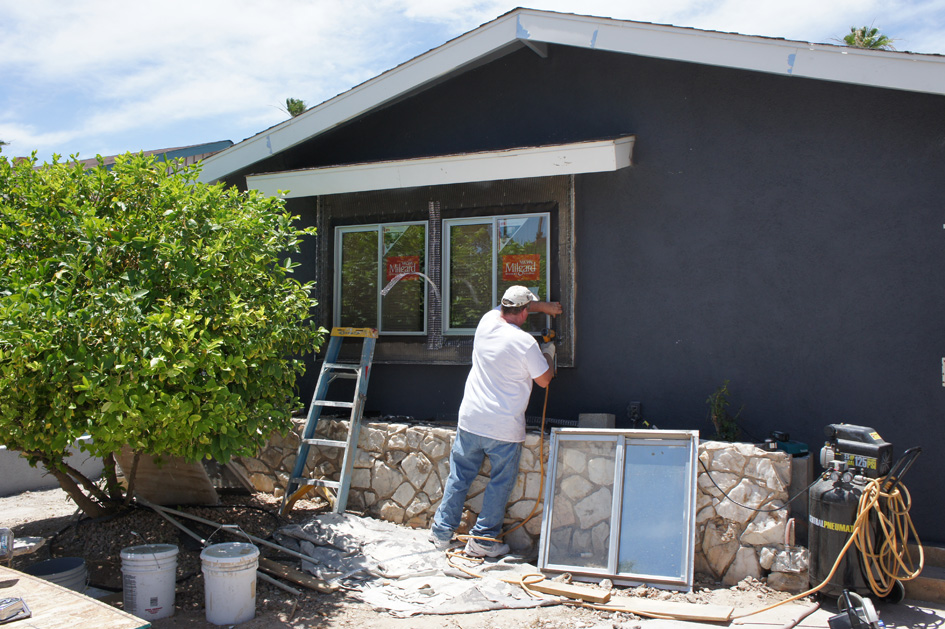
Oh yeah, and here's Lorin installing new windows. The old ones were NASTY single-pane weather and security nightmares. These are brawny (and have nifty built-in pin locks). They actually installed a number of windows and I'm happy to report I have zero nasty old windows left.
How about charcoal with light gray and teal trim? Because when you own your own home in a no-HOA old area, there's nobody to stop you from making insane decisions. Yay! That white stuff around the window is foam for a teal trim pop-out. This was a late-in-the-game idea and Sammy wanted to kill me. I'll have a picture of how this turned out later on (I don't have one that doesn't have the new landscaping!).

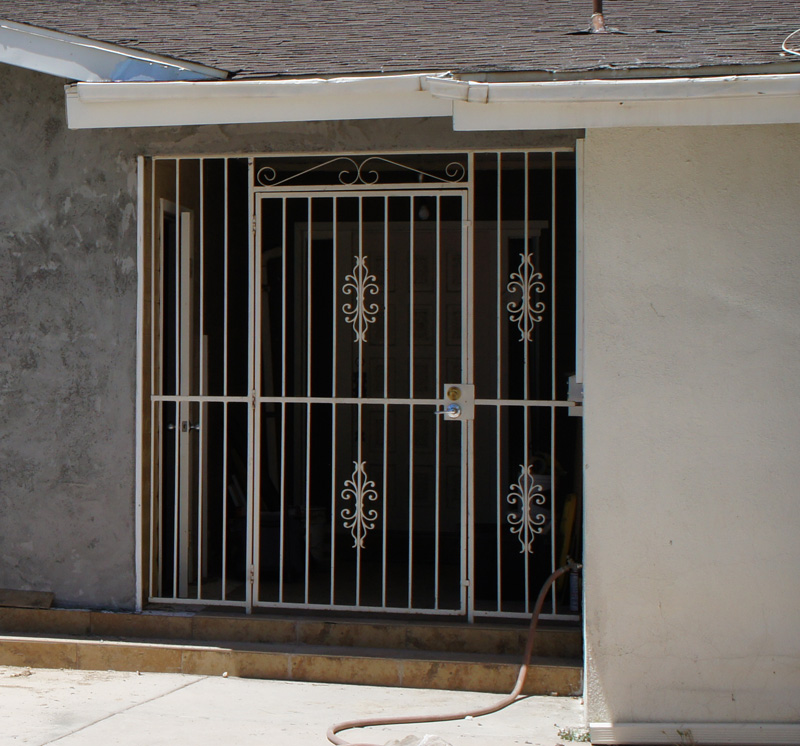
If you look closely at the gate, you'll notice that the "fleur de twirlies" are gone (see below pic). Prior to painting, I went to town on those bitches with a set of Channel-locks and an angle grinder. Sparks were FLYIN', and I felt like a real man (or Jennifer Beals at her day job). Hard to see in the above pic, but the ghetto $14 special deadbolt and accompanying cheapo handle got replaced with more new fancy brushed chrome Schlage hardware. I don't have any pics, but my electrical contractor tapped power off the outlet in the front bed for a light and utility outlet in the new porch closet.
Here's the storage closet with paint. Because the porch is already dark, we decided to go with the light gray trim color for the whole thing.
This will eventually be over the garage; I still need to have power run over there. It's a Remcraft; these are the business if you want authentic, minimal, brushed metal mid-century outdoor lights. I bought a couple others for the side of the house which I'll show in another entry. They ain't cheap, but there's almost nothing else on the market like them. I'm going to see if I can modify the fixture with a light sensor to make them turn on and off automatically.

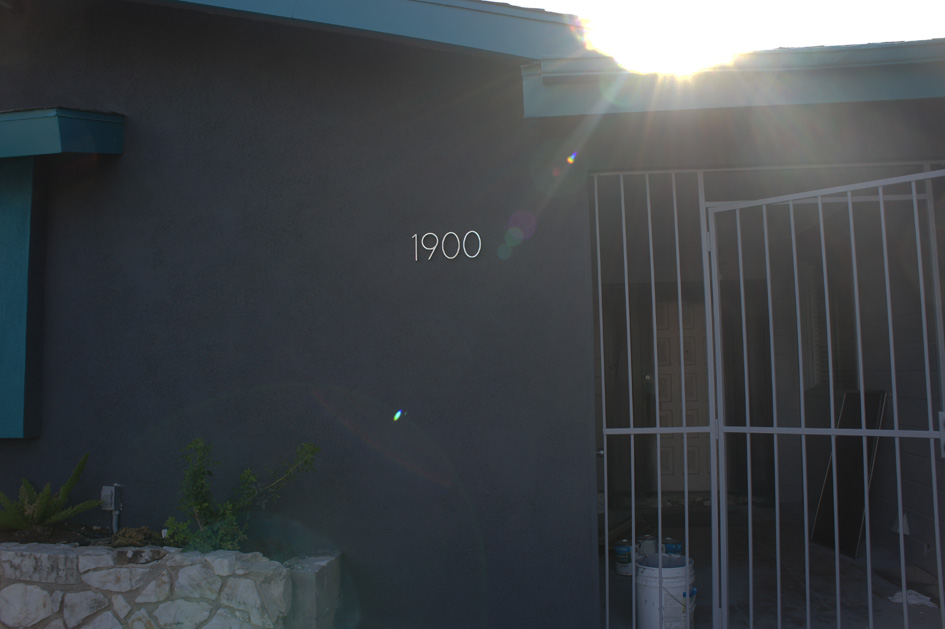
Here are my not-exactly-Neutra address numbers (please excuse the totally unintentionally arty lens flare). They're basically knock-offs of these, which are almost comically overpriced at $27 per number. Really?!? Lucky for me, in an unusal foray into moderism, Home Depot sells these knockoffs for six bucks a pop. Getting 'em in even is tricky business, but I pulled it off with included templates, a level, a drill, and a tube of Liquid Nails.
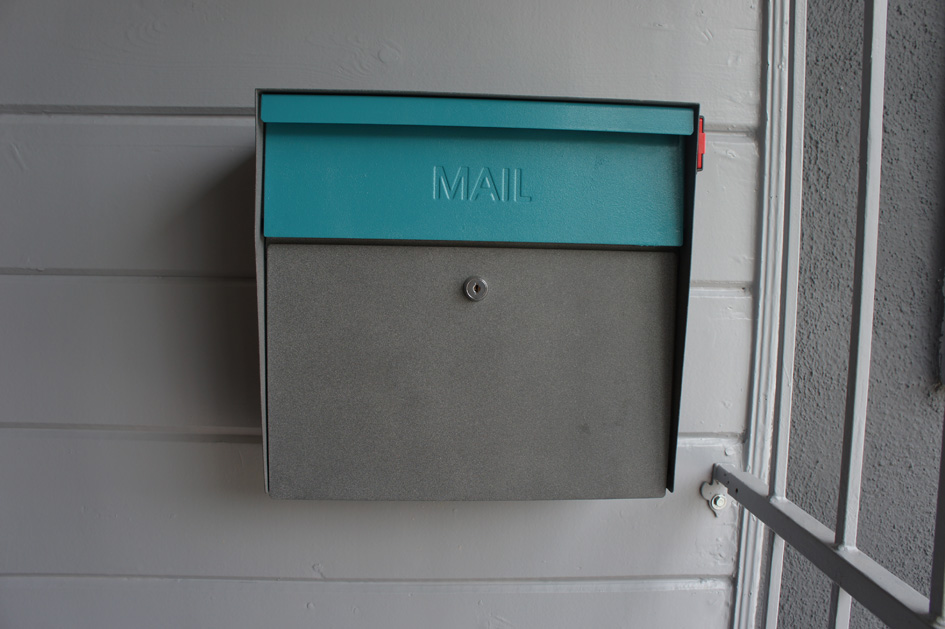
My slick porch was gonna need a slick mailbox, so I bought his bad mofo. Modern mailboxes can be appallingly expensive (as in $500... again, really?!?) but this was only $113 from Amazon. I painted the mailbox door using the same teal paint my contractor used for the trim accents.
I'm still waiting on a replacement front door to replace the awful "conquist-a-door" that was there, that should arrive in a week. And I'm also waiting on a piece of glass for the sides of the front door. Once that's done, I still need a concrete guy to remove the ugly brown tiles from the entry and pour concrete (and maybe polish it).
That's about it for the front of house stucco/paint. Next entry, I'll show all the brick/stucco/wall madness!
 Share Article
Reader Comments (3)
The Specific Identification number or my lowes life we can say credentials will help you to login to the portal to access various sections which are available for each and every employee. The employee portal management system by myloweslife is quite useful for everyone who is engaged with this system
Por esse motivo, você deve primeiro investir em consultoria especializada em SEO, porque a flexão subsequente fica caro e demorada. Então é melhor você procurar uma CONSULTORIA SEO competente e experiente e evitar erros iniciantes tão entediantes
Conheça o melhor Curso de SEO do brasil,as melhores técnicas de seo