
The Dreaded Middle Room
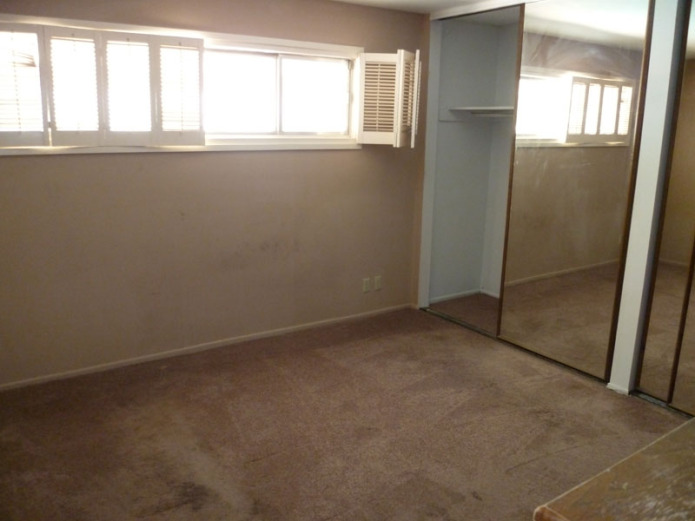
Just when you thought you'd never hear from me again... though I'm pretty darn lazy about posting progress these days, I've been whacking away at this bedroom for months. In case you're reading this and think to yourself, "man, he's really getting things done!", bear in mind that some of these photos date back almost a year (!). At this rate, I'll have the house all done when I'm 117 years old. With all that out of the way, this is a 15x13 room at the back of the house. It's gonna be the guest room/room Kim somewhat makes her own and puts stuff. Here's what it looked like when I moved in: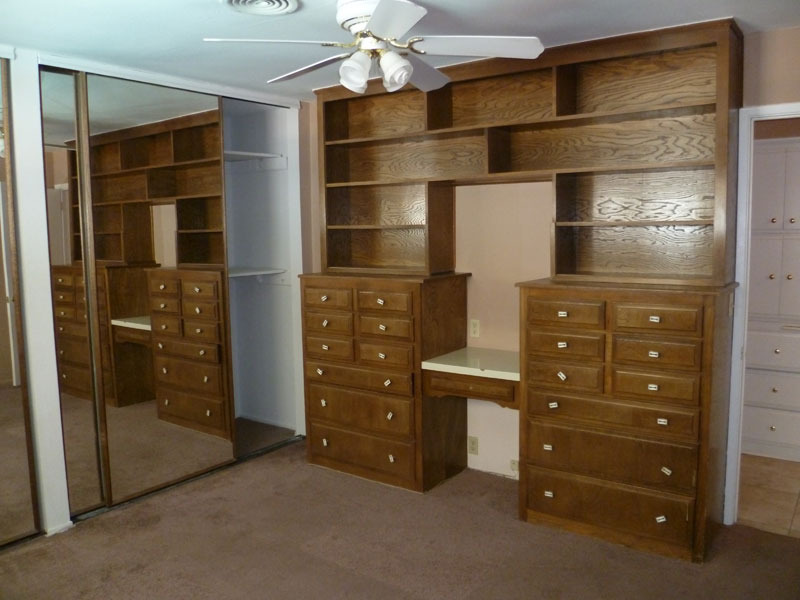
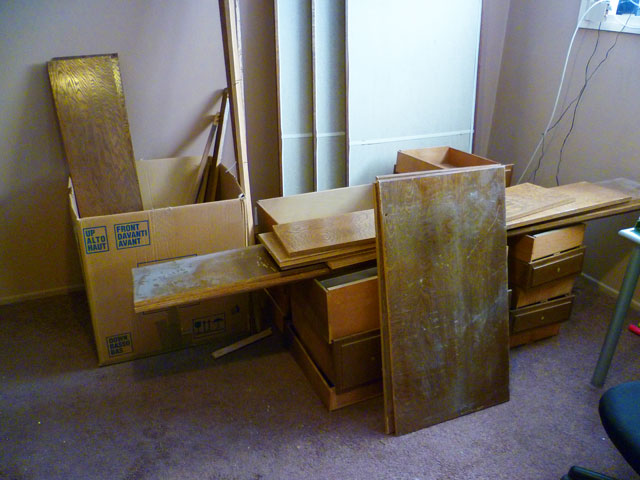
The room was pretty well dominated by the hulking built-in. I contemplated keeping it, but it was a little too traditional for my tastes, so I demoed the whole mess (well, sort of... I still have the tall dresser sections intact). It was REALLY WELL built out of serious plywood and solid wood, which made it hurt even more to kill it. I should've taken more pics as I went, because it was a serious PITA to get apart, compounded by the fact that I did it alone- could've used a couple more limbs and more muscle. 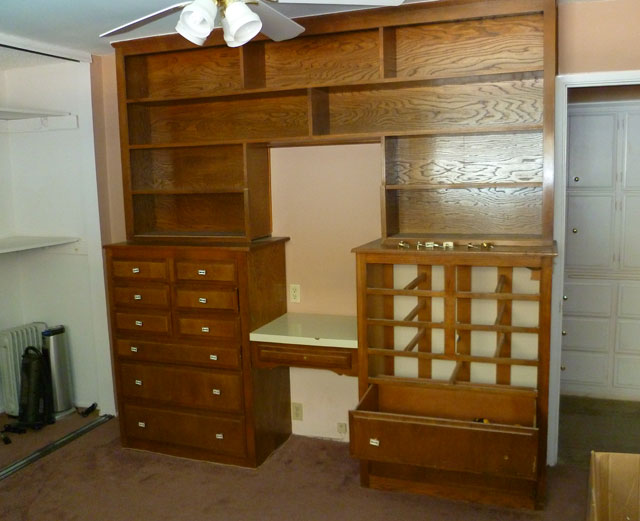
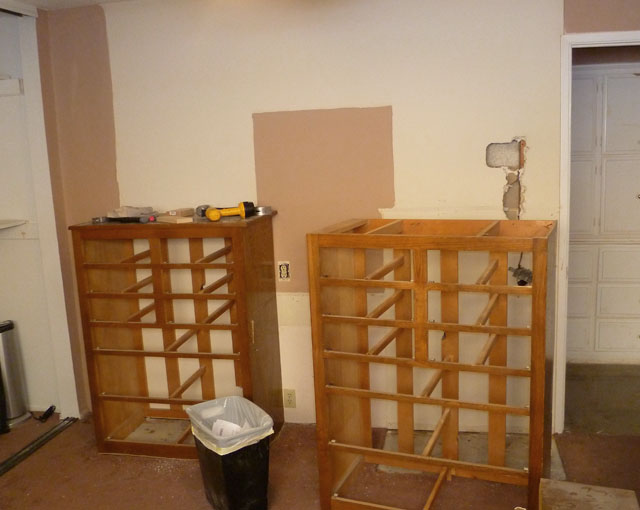
Since the built-in covered so much wall, they went ahead and cut themselves a big ol' sloppy hole in the wall for electrical which I got to patch. I also had to remove and patch the two outlets in the middle; the top one for obvious reasons, and the bottom one because it was way too close to the floor (apparently the possibility of an indoor flood didn't exist in 1963). There was also a switch in the side of the built-in by the door that operated one of the outlets, so I had to reverse engineer that so the "new" outlet would always be live.To the left and above that low outlet was a little junction box, so after unraveling the wiring, I turned that into aforementioned "new" outlet (because it was at a more appropriate height) and removed/patched the low one. 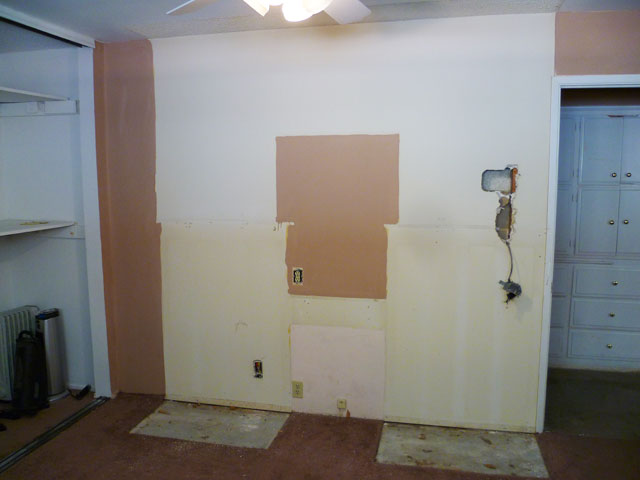
Here's what that wall looks like now. BTW, you can see the little square of pink at the bottom. I assume the entire room was pink at some point, indicating it was the daughter's room. Unless the son was a little light in his Keds...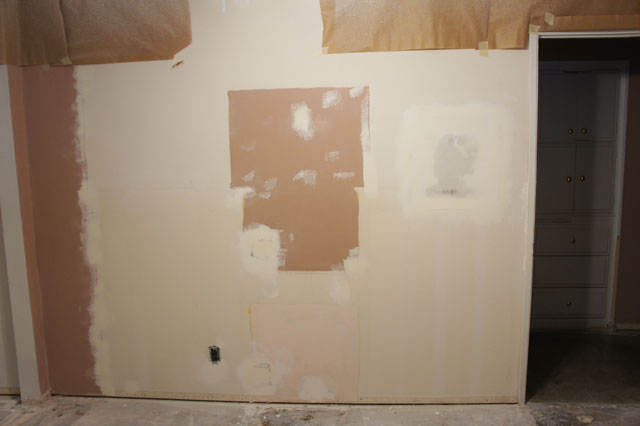
Anyway, I was pretty proud of getting most of the built-in apart without breaking anything. Now I have a ton of wood and god knows what I can use it for.
Lester inquires as to whether he may be of assistance. (actually I caught him in a yawn... why are you tired, cat? I'm the one doing all the work here.)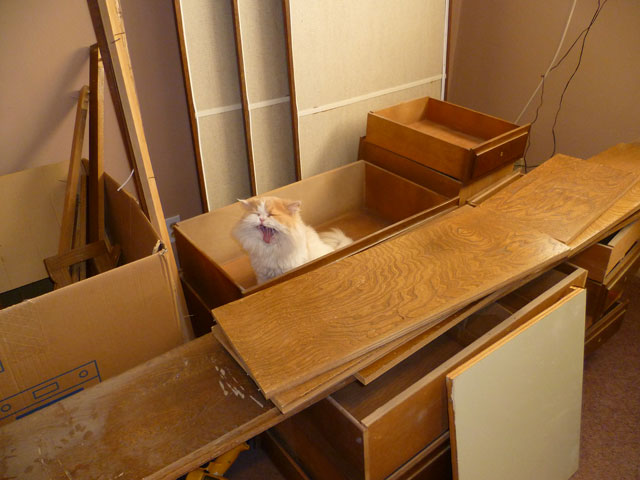
I found the newspaper below, dated January 18th, 1963 buried deep within. This was obviously placed there intentionally and proves the built-in was constructed at the same time as the house. Neat-o, eh? (Yes, I saved it.)
Sometime around all this mess, I fixed up the cable/internet connection with nice plates and properly ran the wires through the walls. This was all covered in this entry.
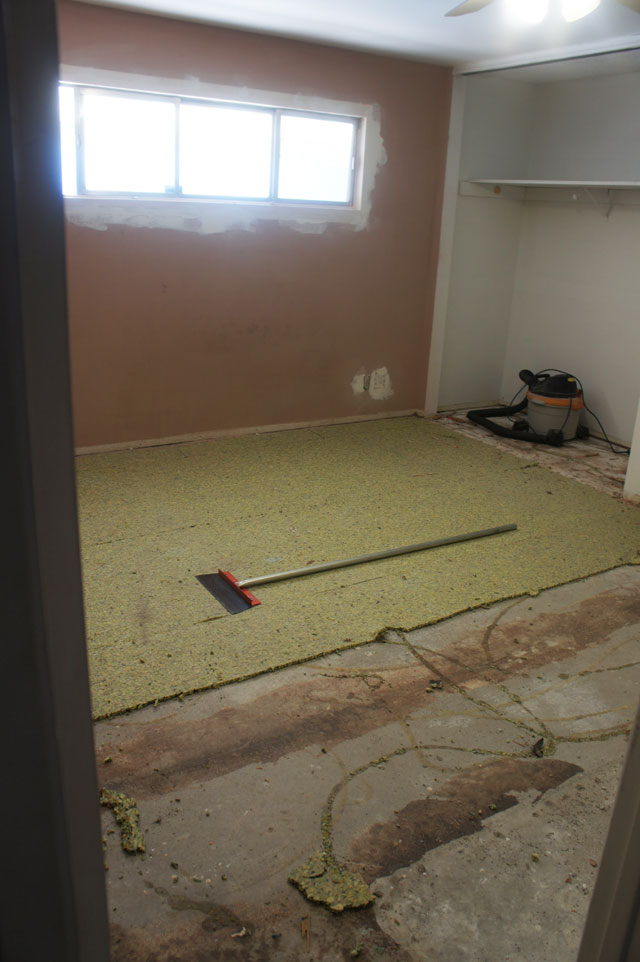
After months of procrastination, I recently got back into it. First thing was to remove damnable brown carpet. I yanked out all the baseboards, then I cut the carpet lengthwise into roughly four foot-wide strips. Since the window doesn't have screens, I simply tossed them out the window into the yard. This was the easy part. Unfortunately, beneath the carpet was padding which was glued to the concrete slab with The World's Most Obnoxious gooky mastic crap. A regular metal drywall knife didn't stand a chance against it, nor did the long-handle scraper you see in the pic of the room, so I bought a seriously heavy-duty scraper:
I didn't fare much better with the megascraper, but on a whim I tried spraying the mastic stuff with some powerful orange cleaner/degooker stuff I had. This helped a lot, but it was still no walk in the park. It also stunk up the house with citrus nightmare for days. In the future (I have two more rooms with carpet), I may call the guy who polished my concrete floors to see if he can just grind 'em down.
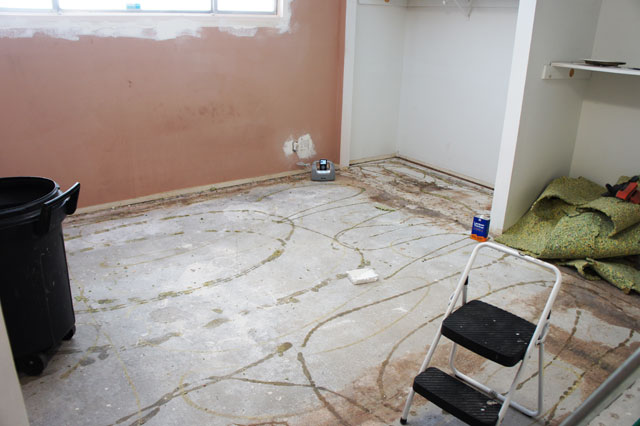
I found an interesting hole in the bottom of the closet - a little research revealed this is a standard size for a cylindrical safe. Won't do me any good though, because I'm doing laminate floor over it. 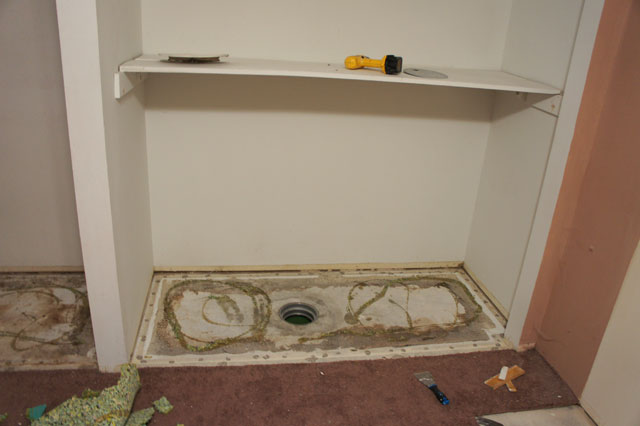
I also yanked out all the shelves, closet rods and supports. I'd describe these as an overpainted, warpy bent, hot mess. Good riddance. 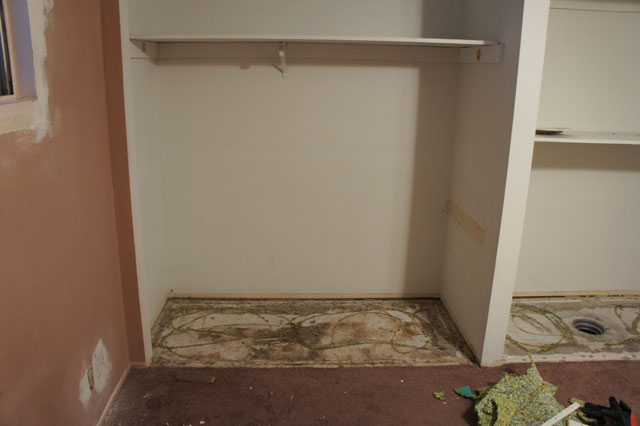
Here's what the closets look like now. I'll explain the brown masking paper soon. 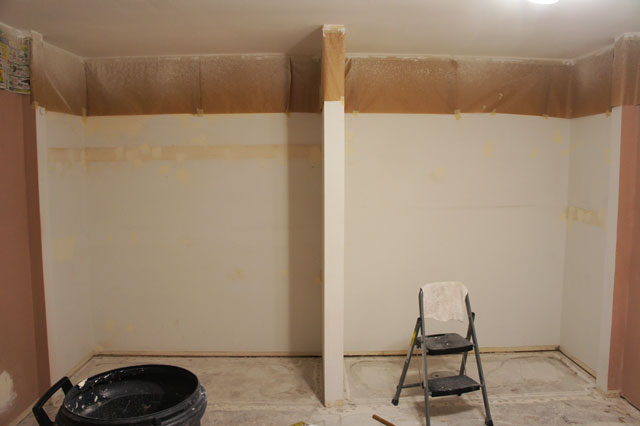
Next problem... apparently the ceilings were all popcorn textured at one point and they redid them with a subtle knockdown texture. When they redid them, the dummies didn't bother to redo the closet ceilings, nor the ceiling above the built-in (admittedly, this wouldn've been almost impossible without demoing it), leaving me with this: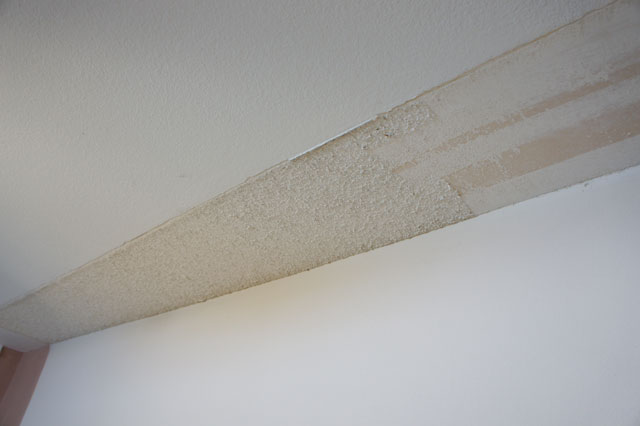
And this: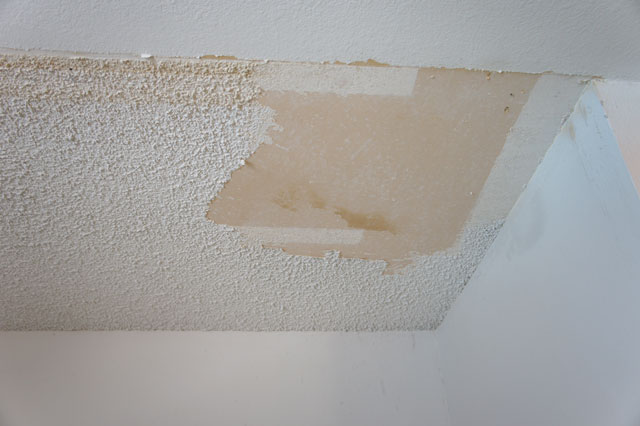
In the pics above, I've actually already started removing it. The good news is that popcorn ceiling is pretty easy to remove, you just spray it with soapy water and scrape it with a drywall knife. Only downside is that it makes a mess. And that you have to do something about your now-naked ceiling so that it matches the rest of the texture... if you've read my blog for a while, you might remember that I had to texture a huge amount of the ceiling in the kitchen. This time around, I borrowed a texture gun/hopper dealie from handyman Keith and used it with my air compressor (hence the brown paper, so I didn't hit the walls with texture). Once you get it dialed in so that the texture is similar, it's not too bad. My three-gallon air compressor was a little underpowered for the job (it ran out of air pretty quick), but passable for a small job like this. With that done, I painted the ceiling flat white (with Kim's help). A picture probably isn't going to look like much, but suffice to say, the ceiling is pretty uniform now. You can see little differences in the texture, but you really have to look for it. And as far as I'm concerned, if you spend that much time staring at ceilings, you have far bigger issues to contend with!
What's left...
So glad you didn't ask. Handyman Keith is coming over to assist me in relocating the light/ceiling fan switch. Because of the former location of the built-in monstrosity, they swiftly located the switch on the wrong side of the door (incidentally, an excellent name for a Jim Morrison/Pink Floyd collaboration) as you can see below. This makes things challenging in the dark. We're gonna move that guy over to where it should be by the entry (the attic access is very closeby in the hall, so it should be easy), and I'll patch my 673rd wall hole. 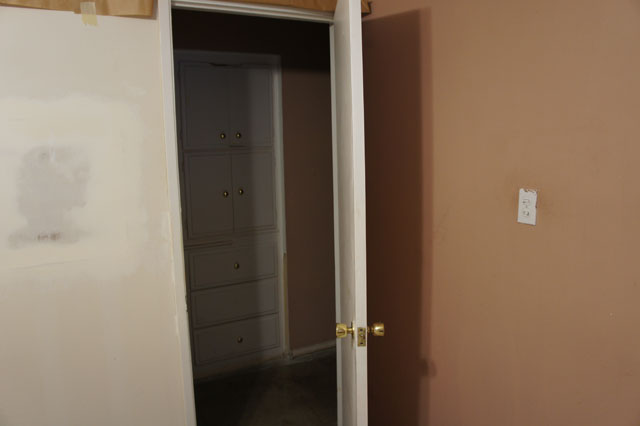
Speaking of ceiling fans, the room came equipped with this horrifically ugly one: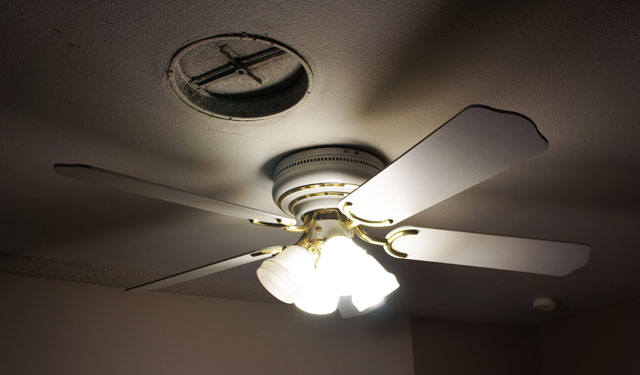
Not only is it ugly, but for some reason it's not mounted in the middle of the room, it's noticeably too close to the front wall. Yay, my house. So... unless there's something up there preventing it (and me and Keith can't think of any reason why, other than pure stupidity), we're gonna go nuts and relocate the light/fan to the middle of the room. Of course this gold and white antiquity ain't staying, it's getting replaced by this... ... which has been patiently waiting in a box in the hall closet for months.
As mentioned, I've already put the first coat of paint on the newly textured ceiling. I'm also making my first foray into wallpaper. A while back I ordered the nifty wallpaper below for the back (window) wall only. I scanned a relatively small piece of it, so you're not really getting the entire pattern here, but trust me, it's cool. The place I found it is a German website called Color24.eu, and if you think you don't like wallpaper, they might change your mind.
The remaining walls will be painted the ligher of the two grays. Home Depot color matched it and I have two cans of paint ready to go.
This room will also get two sets of the DIY sliding closet doors I made a year ago (gasp). I have all the slider hardware for these as well. 
I also spent some time looking into closet organizer hardware today, and it looks The Container Store and their fancy-pants Euro Elfa stuff will be separating me from some money.
As mentioned, I'm doing laminate flooring in here. I bought the flooring a couple weeks back from the pushy clowns at Lumber Liquidators, who always seem to be having the SALE OF THE CENTURY, NEVER AGAIN SAVINGS, blah-de-blah. As with with studio, it's a relatively light color, but this time I went with a slightly more rough-hewn handscraped look. I bought enough to do this room as well as the master bedroom when the time comes. I'll have a zillion pics when I'm breaking my back/butt installing it.
Finally, the other Monster Project for this room (and a big reason for my procrastination) is window replacement. All the windows here are single-pane blurry awfulness, so we're gonna cut out the existing 2x8 OXO window and replace it with a new low-E, double-pane new one for weather protection and security. This will surely be a mess and hopefully not destroy the wall too much. Wallpaper will definitely wait until this is complete.
 Share Article
Reader Comments (1)
Conheça o Portal Elos o melhor site de noticias