
toekickin' back
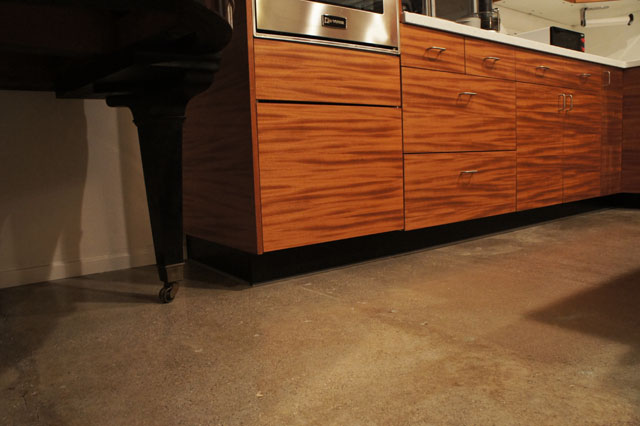
In case you're saying to yourself, "isn't he ever gonna be done with stupid kitchen already?!?", I'm probably saying the same thing, so I beat you to it. It's really almost there, I promise. However... I've been putting off doing the stupid toekick panels forever (those are the little pieces underneath... that you might kick with your toe, get it?). It's such a long and stupid story, but 1) I knew I'd need to borrow John's compound mitre saw (which I've had in my possession for at least six months), 2) I was gonna paint them to try and match the floor (which was stupid, because the stock Ikea brown-almost-black color looks fine), 3) laziness. Anyway, I finally got to it yesterday, but I still haven't done the island, for which I have a sort-of explanation later. Most of it was pretty easy... had to thoroughly vacuum underneath the cabs where dustbunnies have been accumulating for roughly a year, then had to cut to size and install Ikea's little clampy system that works like this: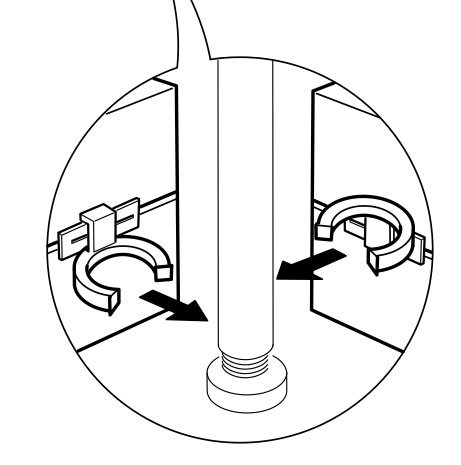
The little rectangle thing has a ridge that slides into the back of the toekick panel (or "plinth" in Ikea-speak), then the clamp part slides onto that and you align the whole mess so it pops over the leg. Like lots of Ikea stuff, it's a good idea in theory, but the el cheapo implementation falls a little short. First of all, aforementioned rectangle w/ridge frequently just falls out of the slot. I remedied this by squirting construction adhesive in the slot. Also, if you don't have the plastic clip aligned just right with the leg, the clip breaks. The good news is they include a whole set of this mess with every leg and since the back legs of any given cab don't have toekicks, you end up with lots of extras, so no problem there. This little 15" section is the first one I did (I didn't do them in front of the refrigerator- the bottom of its frame sticks out a little too far anyway):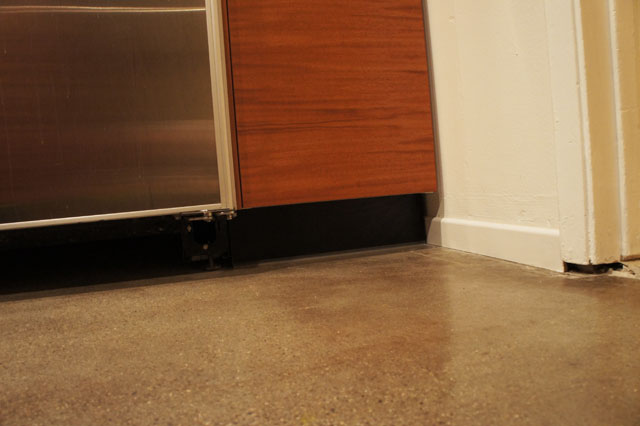
Hard to see in the pics, but they also give you a little clear plastic "lip" that goes on the bottom that I presume helps prevent liquids from seeping in. This needs to be trimmed correctly, but can be done with sharp scissors. Here's the rest of that wall. Sorry about the crummy mat- our upright vacuum is wonky these days :(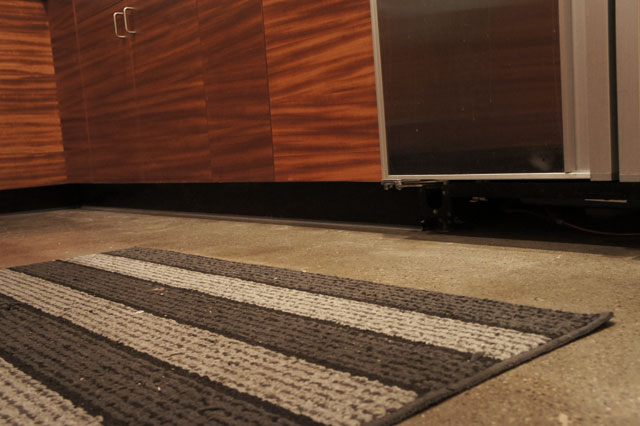
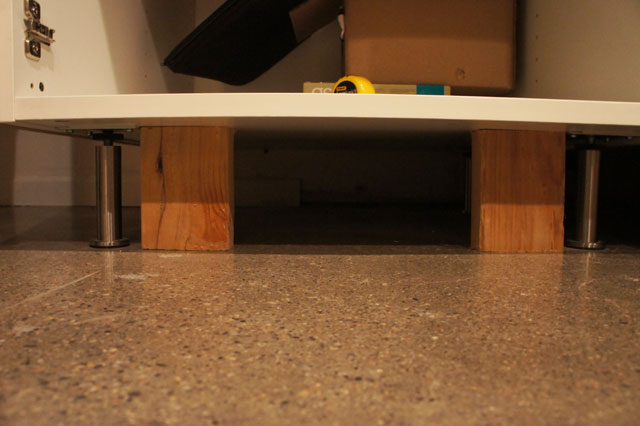
I didn't use the standard plastic legs for the end cab with the oven/microwave because it weighs over 200lbs fully loaded, so I upgraded to metal legs. These won't work with the Ikea clips, so I cut some 2x4 blocks and screwed them from the top with countersunk drywall screws, giving me something to attach the panels to. The tricky part was setting them back exactly the correct amount so the panels would all line up correctly. Once I had the 2x4's in place, I used my pnuematic nail gun to attach the panels. It leaves little dents, so I'm gonna do a little wood filling and paint touch up (need to match the color first).
I still haven't done the island- I painted a couple of the panels gray (long story, but later realized standard color was better) and need to repaint them back to blackish-brown, then I'll cut and mount them too.
 Share Article
Reader Comments (2)
Conheça o melhor Curso hacker do brasil...
GetFreedomUnlimited - It will pre-fill all of the information that you are pre-qualified for, making it easy to make the getfreedomunlimited.com card using the invitation quantity, 5-digit zipper code, and final title.